Scoro is, no doubt, one of the most comprehensive work management software available. It’s often praised for the interlinkage of all features and data, intuitive interface, and high customizability, enabling every business to find their ideal workflow.
But a product is only as powerful as its users. And we genuinely want our customers to know the best ways of using our product. From customer onboarding and webinars to our insightful articles and information-packed help center – we work tirelessly to empower teams to work more efficiently.
We also bet there are countless undiscovered hacks in Scoro that you haven’t heard of… yet. So, we talked to our team and gathered 12 of our most used and loved shortcuts into this list, so you can start benefiting from these too!
1. Quickly add a new task, event, and more…
If you’re one of those Scoro users that go to the Task list to add a new task or to the Calendar to add a new event, you need to hear about this tip!
You’ve probably seen the small + sign in the header menu of your Scoro site. By clicking on this icon, you can quickly add any type of new entry (e.g., a new task, company, quote, etc.), no matter where you are on your Scoro site.
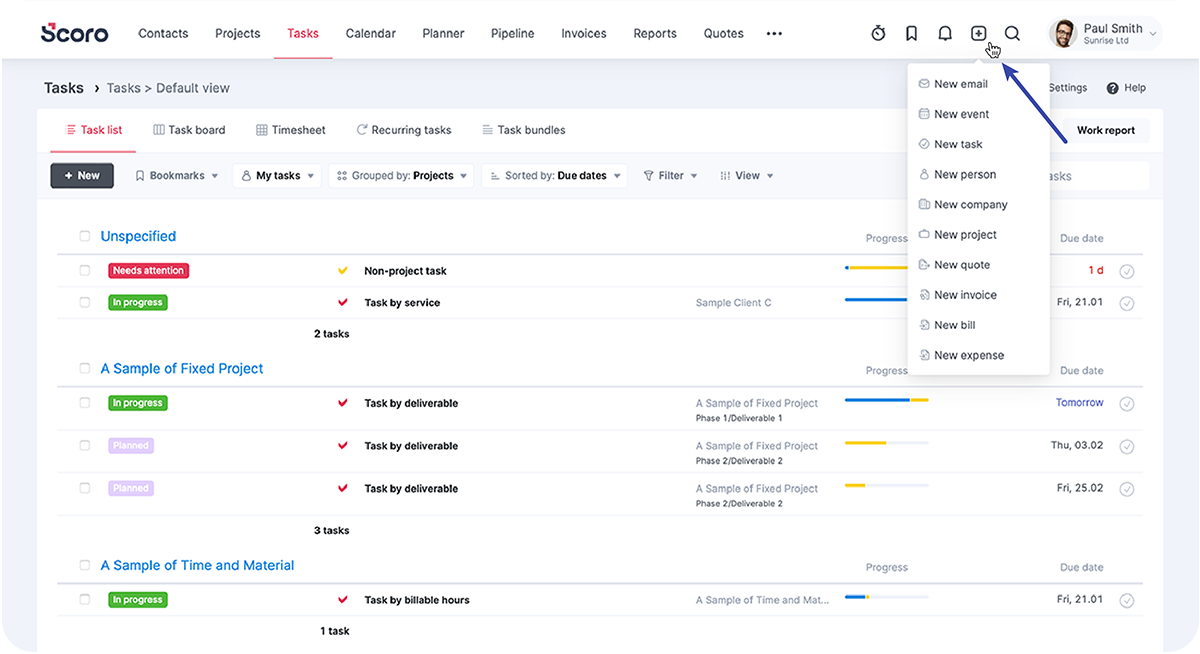
TIP1. If you need to add a task in other views (e.g., in contacts, projects, quotes, etc.), it will be automatically linked to the relevant data.
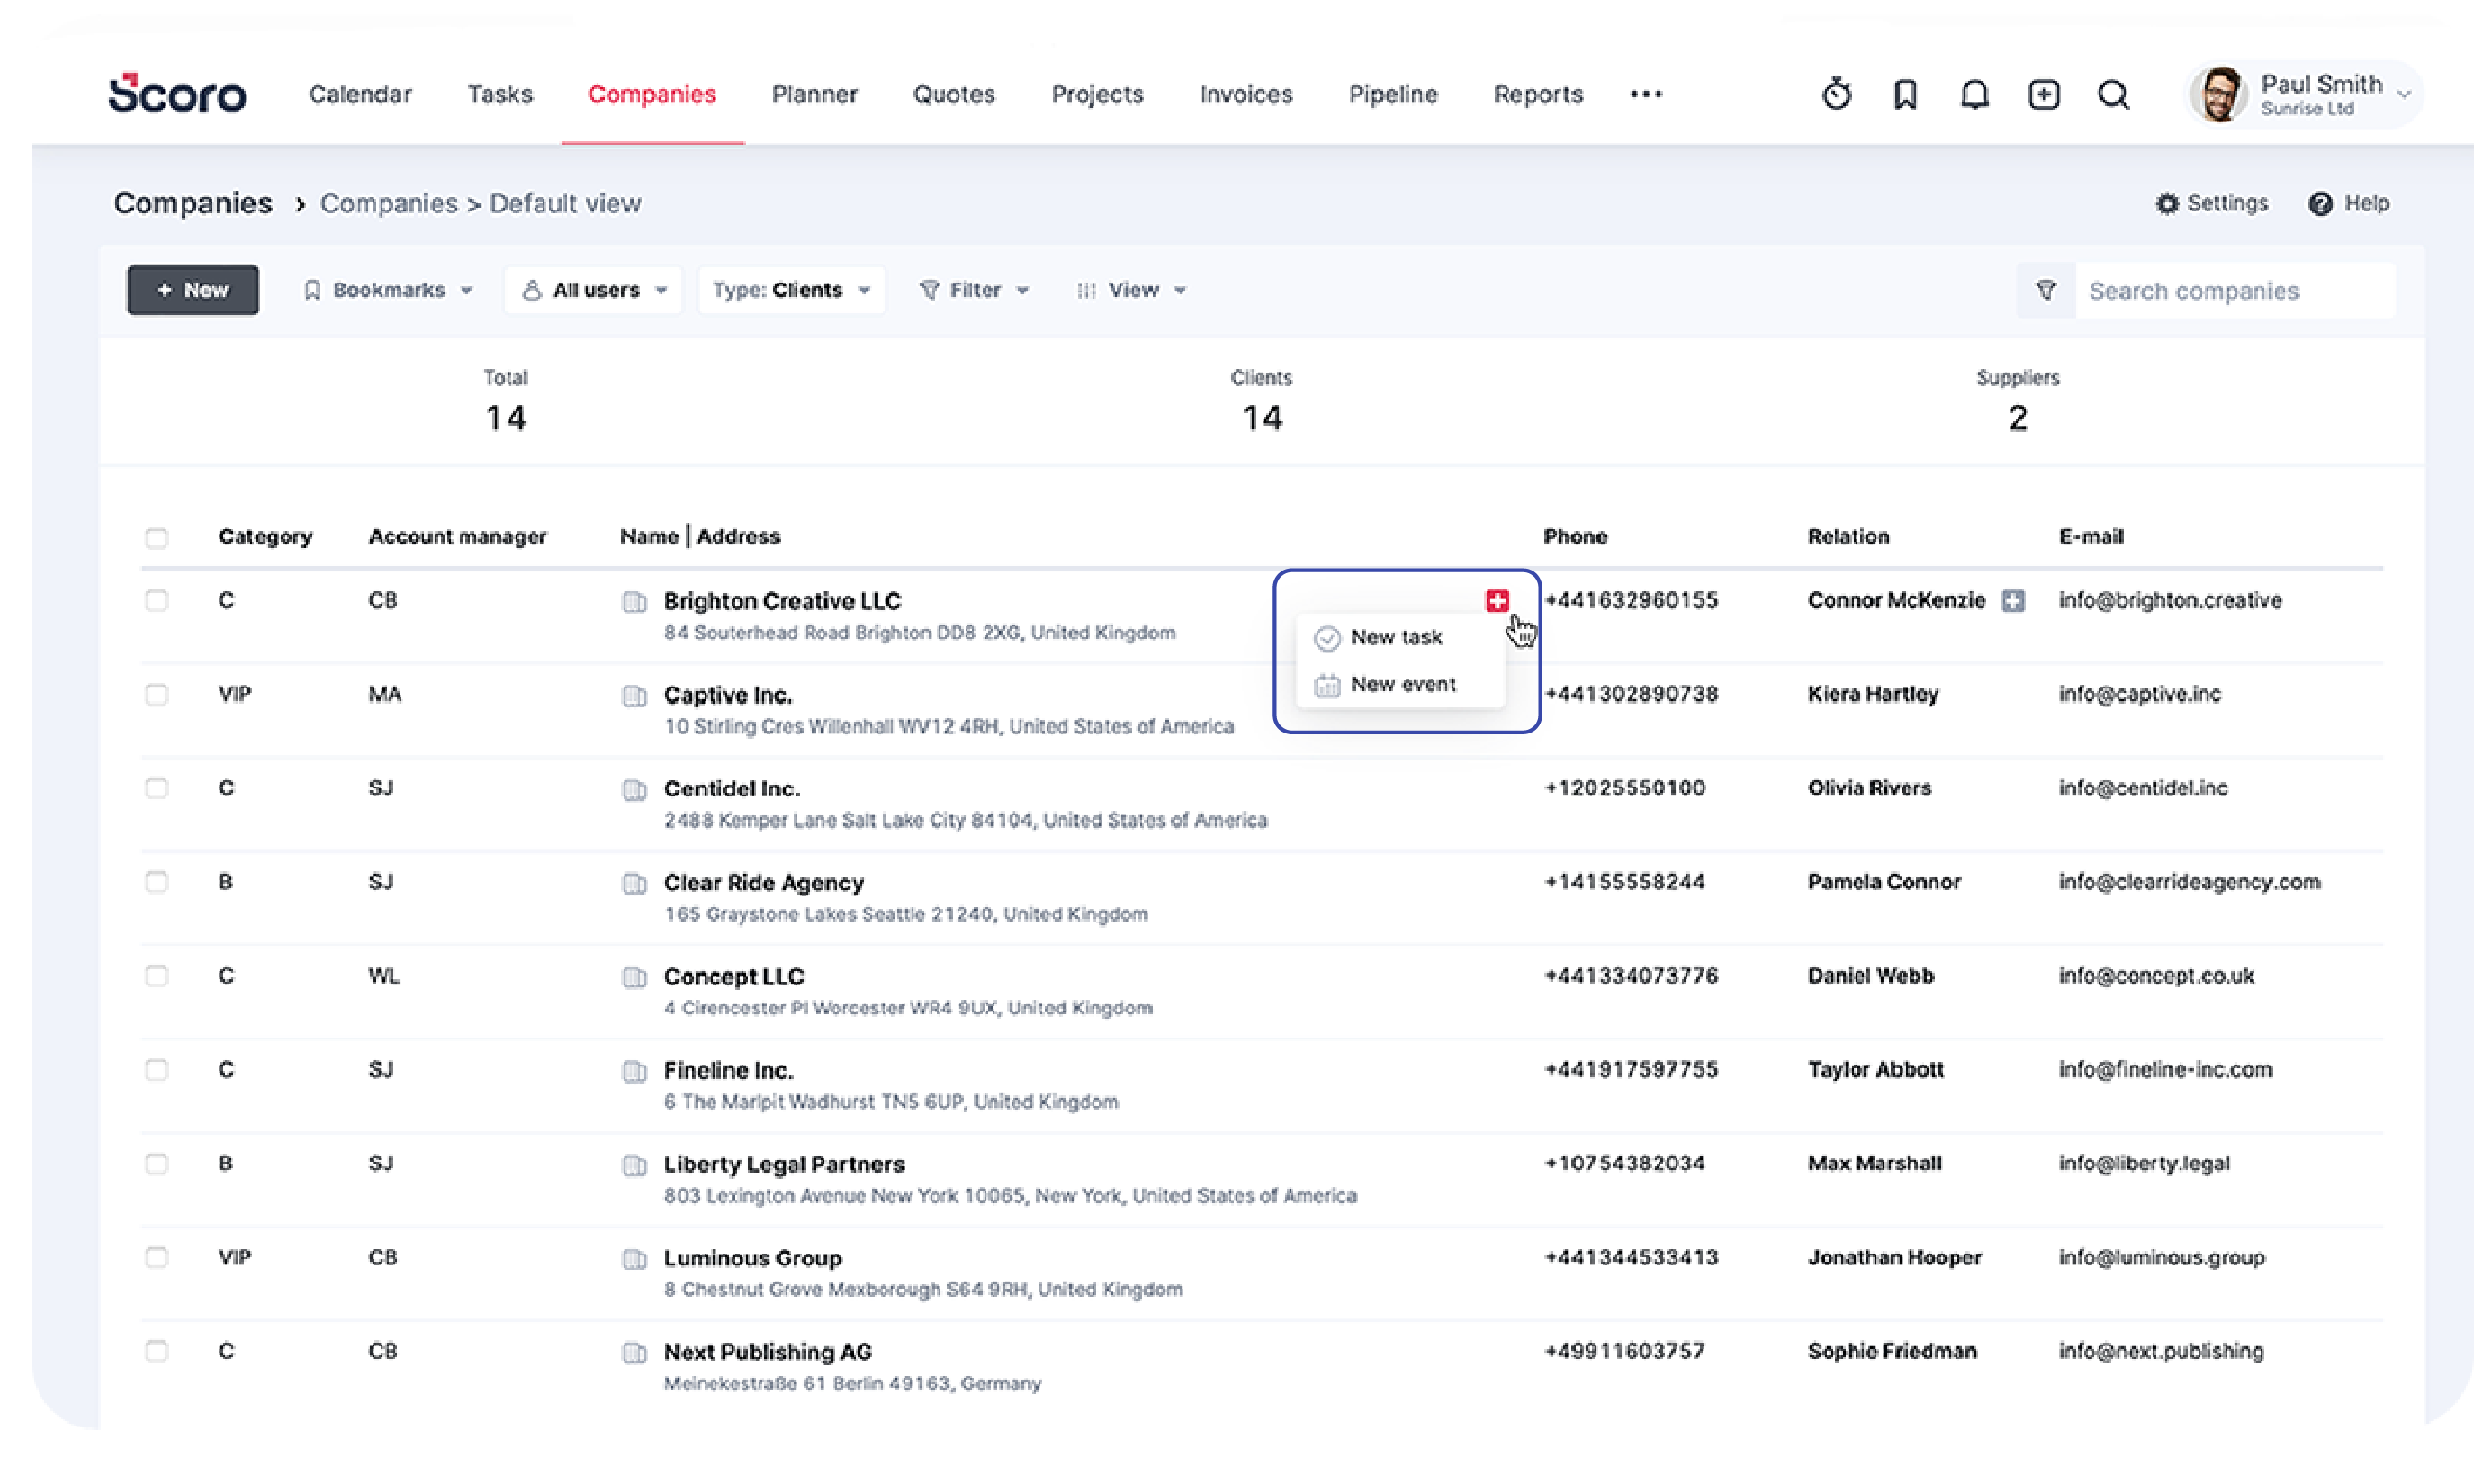
TIP2. If you have a company-related task or event, you can add them directly from the contact list view. Just hover your cursor over the company name, and a small + sign appears. Click to add a new task (or event) – this way, it will be automatically linked to that company.
2. Accomplish more with fewer clicks
We’re all about efficiency in Scoro… and want you to accomplish more with fewer clicks. Too good to be true? Let us show you how!
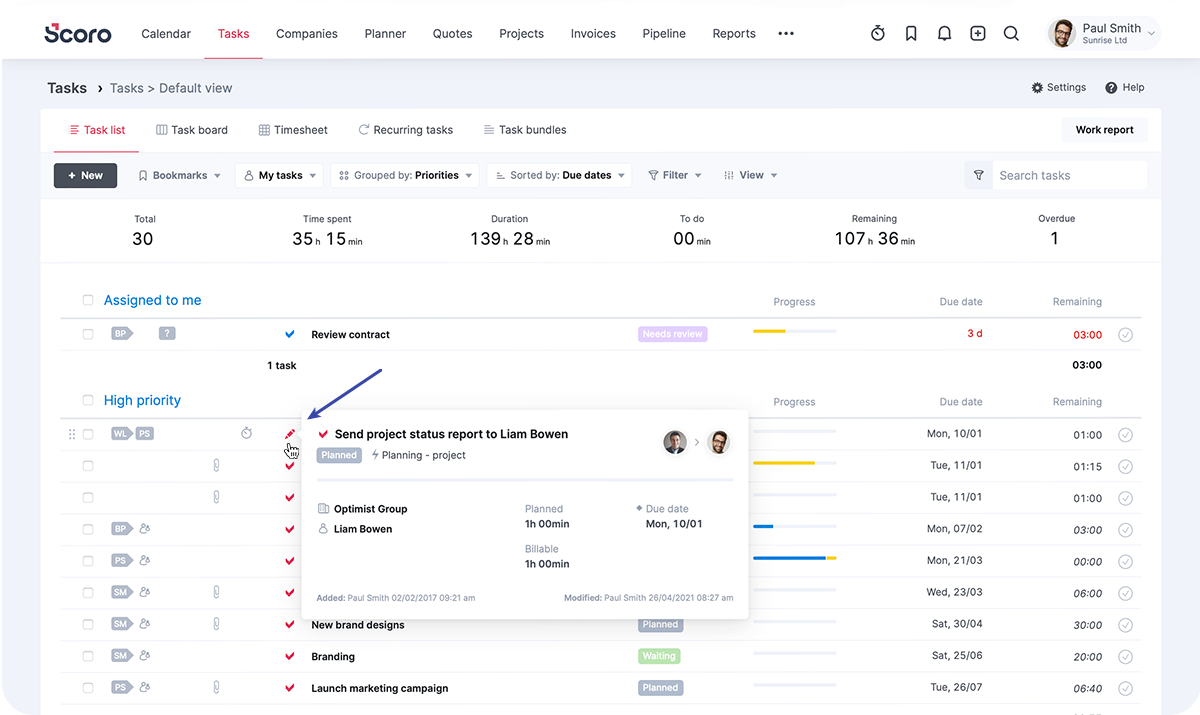
When you want to modify a task in your task view, you can do it directly from that view. Instead of clicking on the task and then choosing “Modify”, you can simply click on the checkmark icon (see above).
The same logic applies to other views:
- Calendar view – click on the event time
- Project view – Click on the project number
- Quote view – Click on the quote number
TIP3. Hovering your cursor over the task enables you to easily start a time-tracker or log time directly under the task.
3. Double-bookings and booked time slots
Scheduling events for multiple people is easy… unless your calendars are fully booked and finding that one available time slot seems like a mission impossible.
Luckily, there’s a way to filter out the time slots available for all users. Just click on the View button, and under the View options, make sure you’ve only selected Show available time slots.
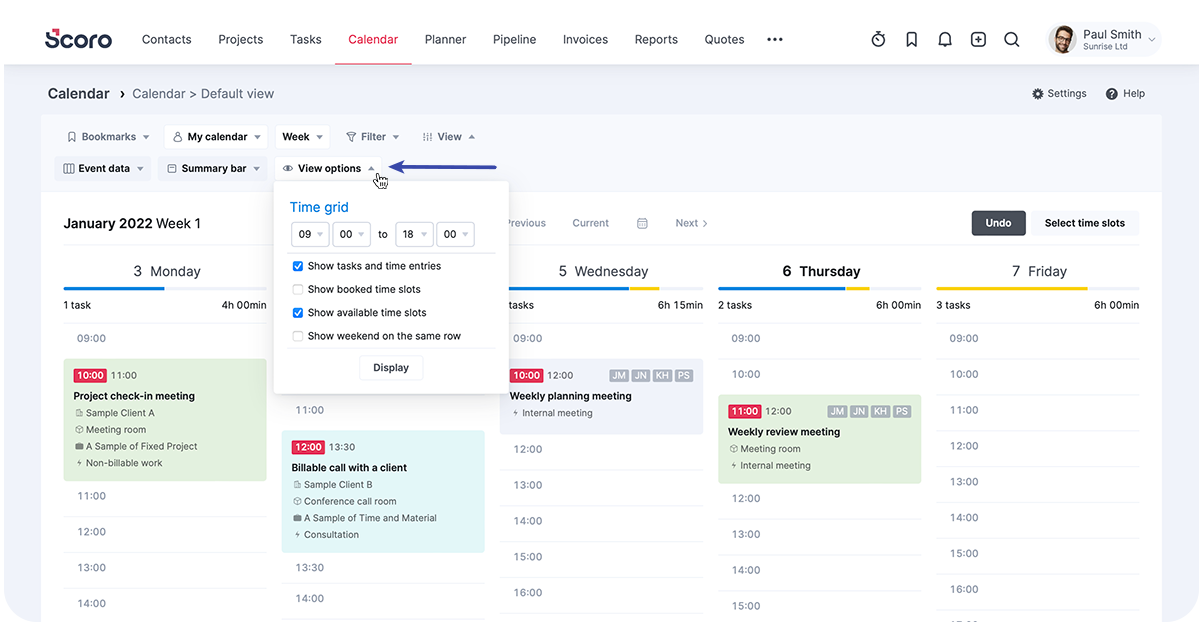
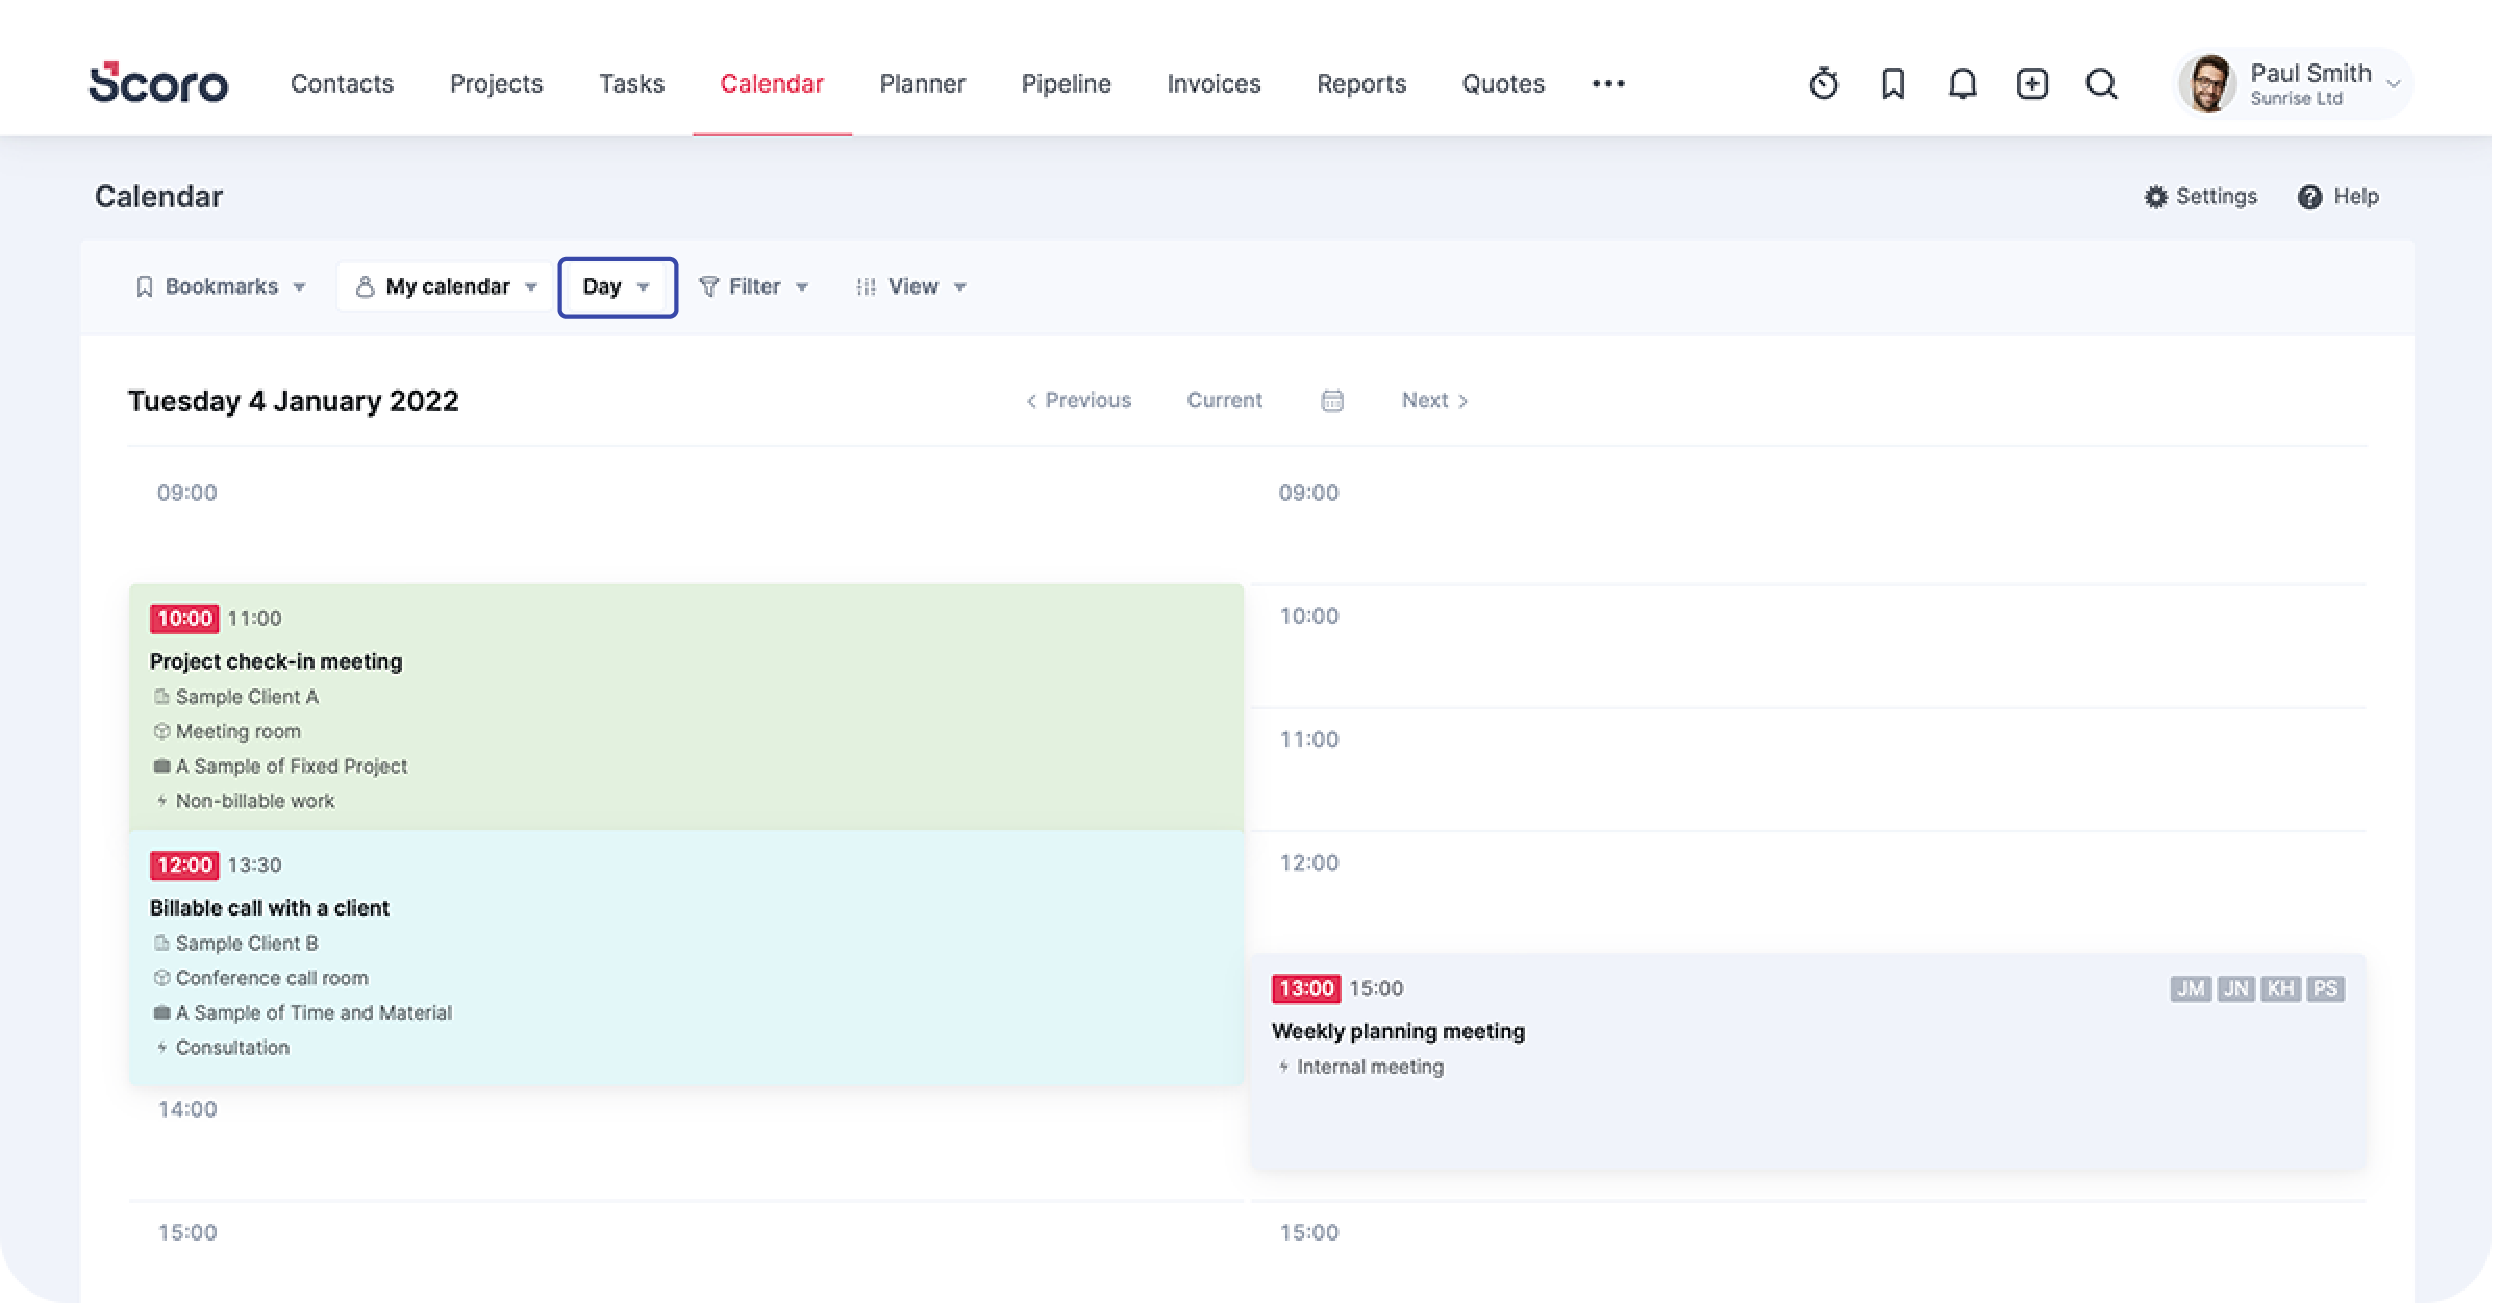
How to avoid a situation where you are having a meeting and only halfway through you get a notification about your next scheduled event?
To ensure there aren’t any double-bookings in your Calendar, use the day view in the Calendar.
4. Filters, filters everywhere
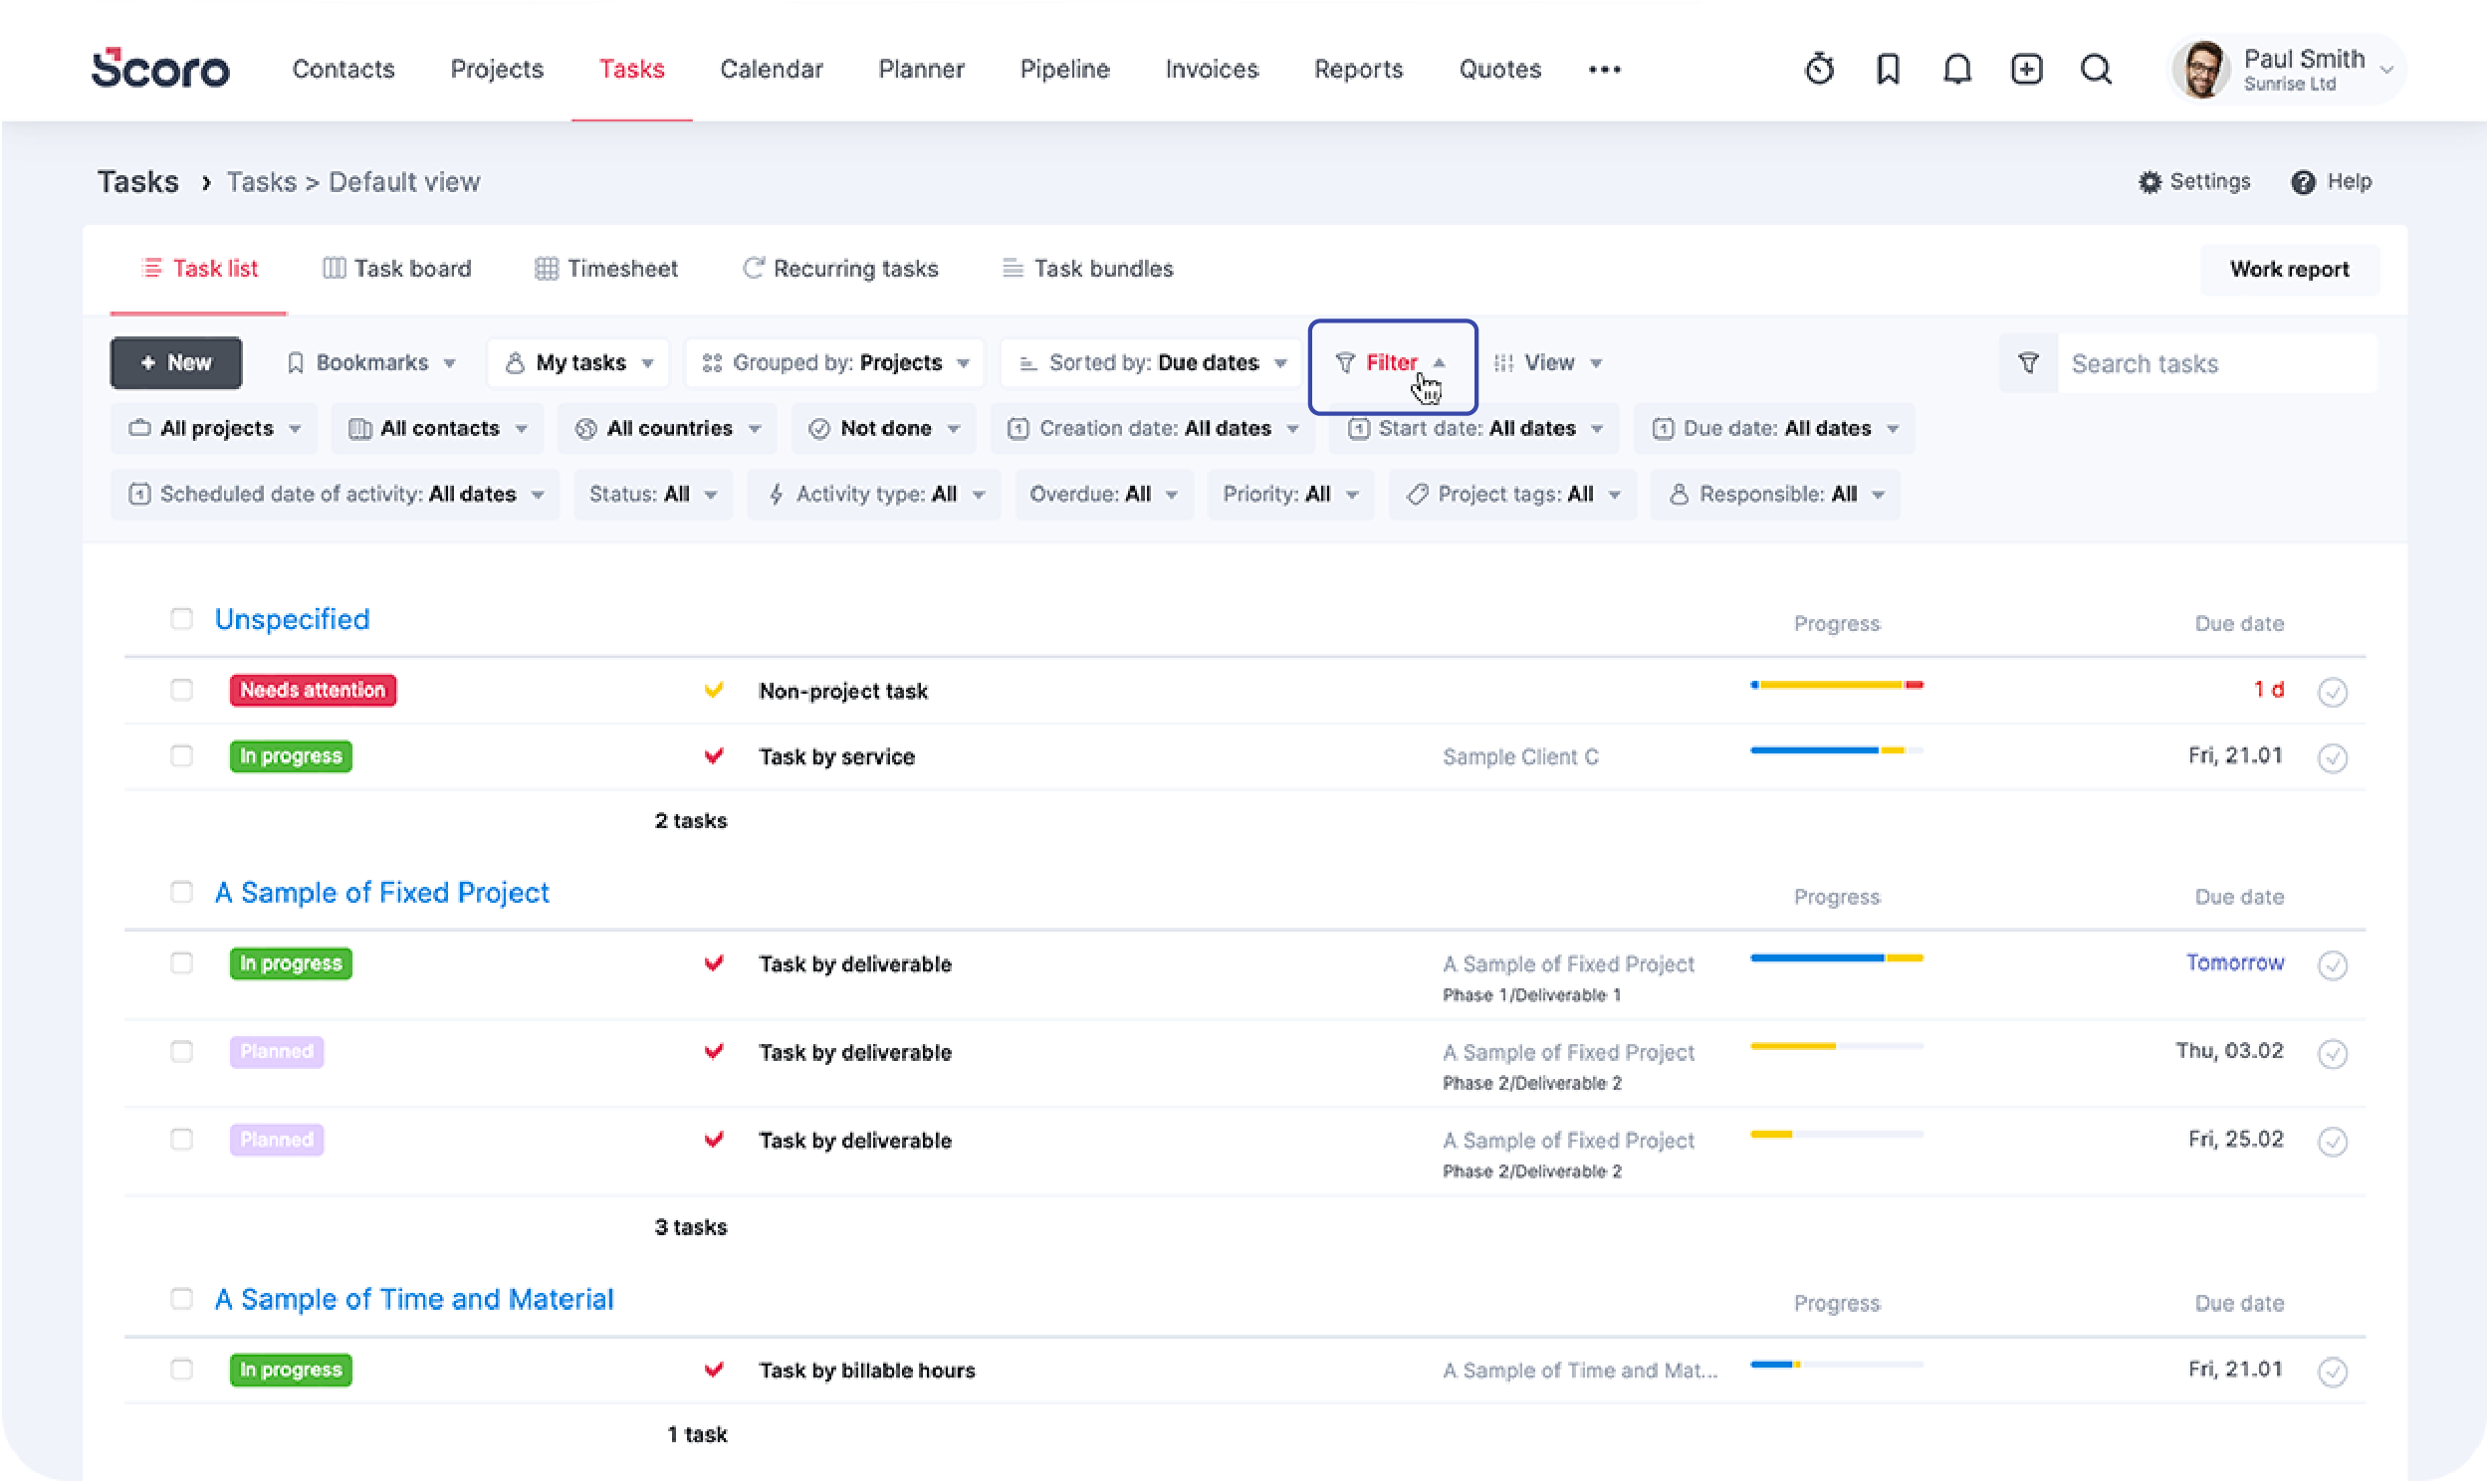
In any list view – be it tasks, projects, quotes, companies, or detailed work reports – you have an option to filter these lists in thousands of different ways.
The Filter button opens a cave full of treasures for you and enables you to customize the view according to your exact needs.
5. Custom fields in list views
If your company uses custom fields in Scoro, you can filter any list or view according to your needs. Even better, you can add custom columns to your lists. And the possibilities are endless!
Learn how to set up custom fields in Scoro
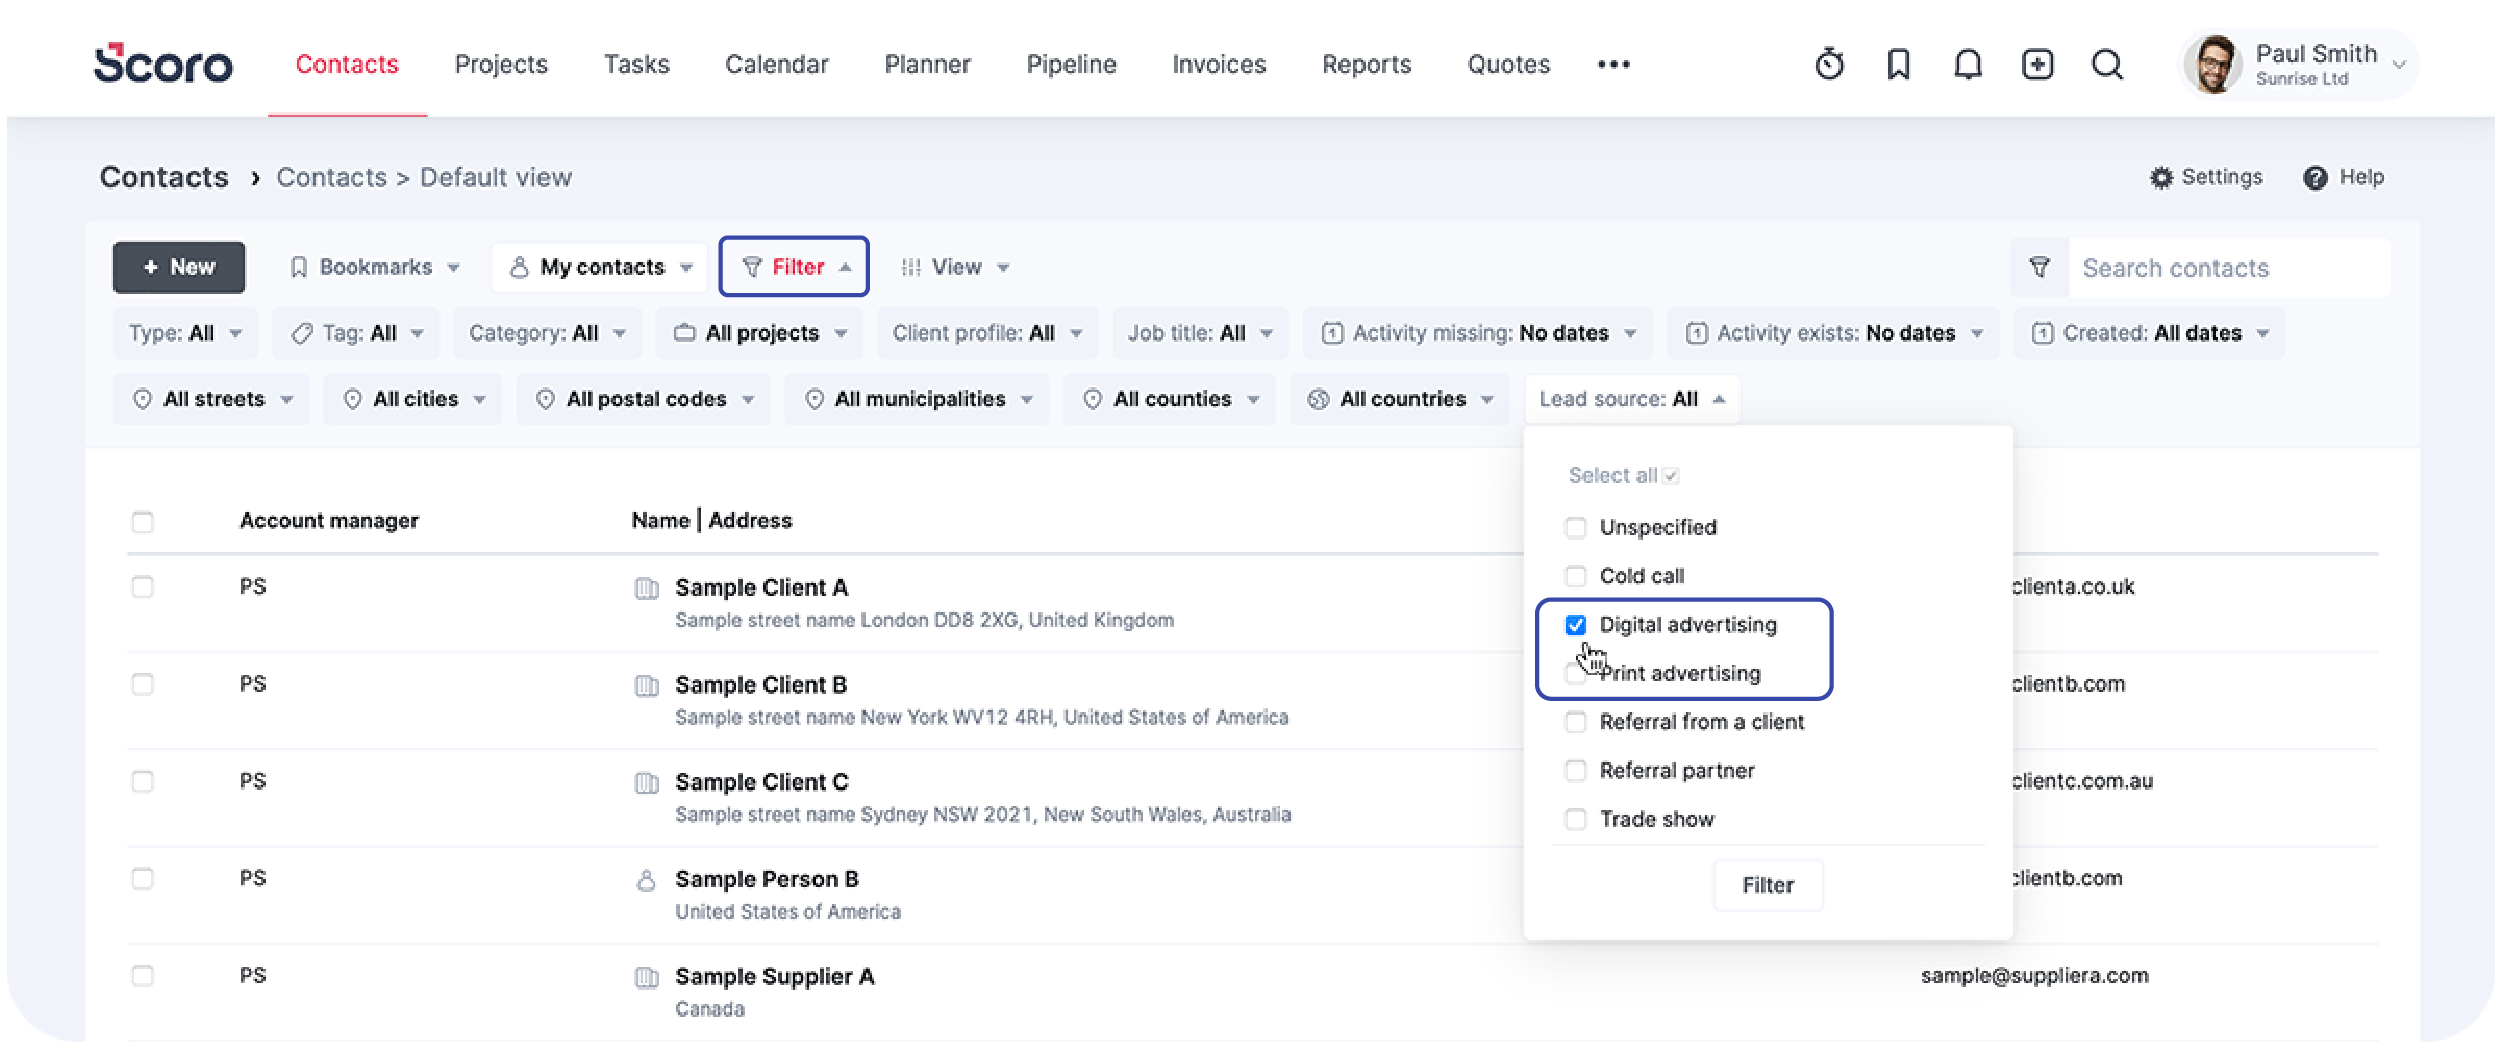
To filter a list by an already existing custom field, you simply need to click on the Filters button and pick the relevant filter.
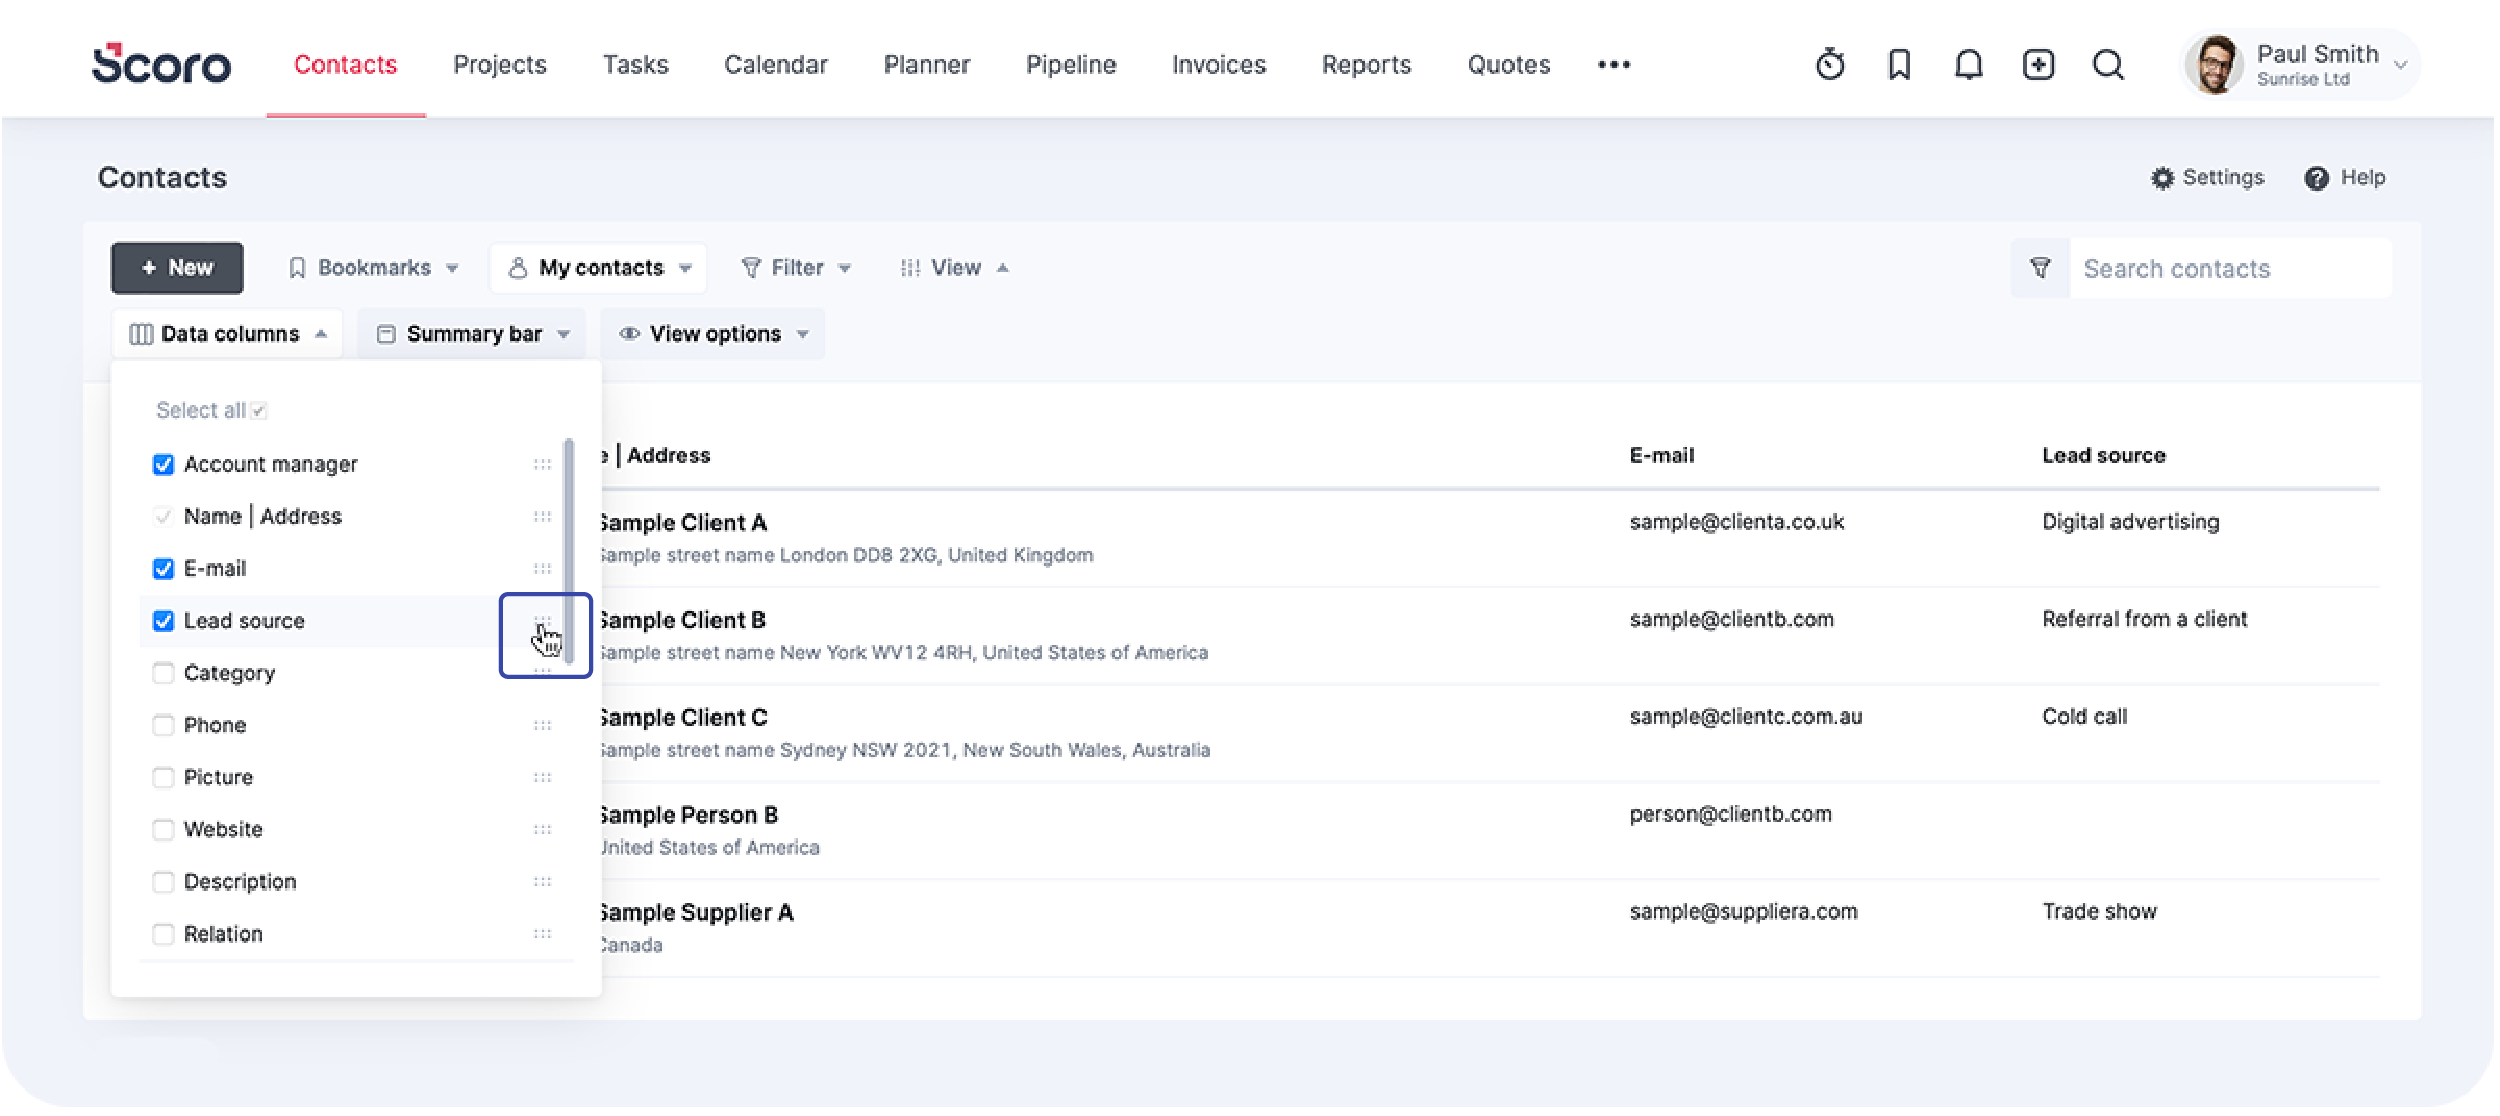
To add a custom column to your list view, click the View button and tick the suitable viewing option. Just click the name of the column to sort the list.
Remember this hack whenever you organize and filter your lists. It will make your work so much easier!
7. Bookmark anything
Knowing how to filter lists and get a much better overview of data is a great start. If only you wouldn’t have to go through these steps manually every time… Great news – you don’t have to!
You can save any filtered list as a bookmark and quickly access your favorites by clicking on the Bookmarks icon in the header menu.
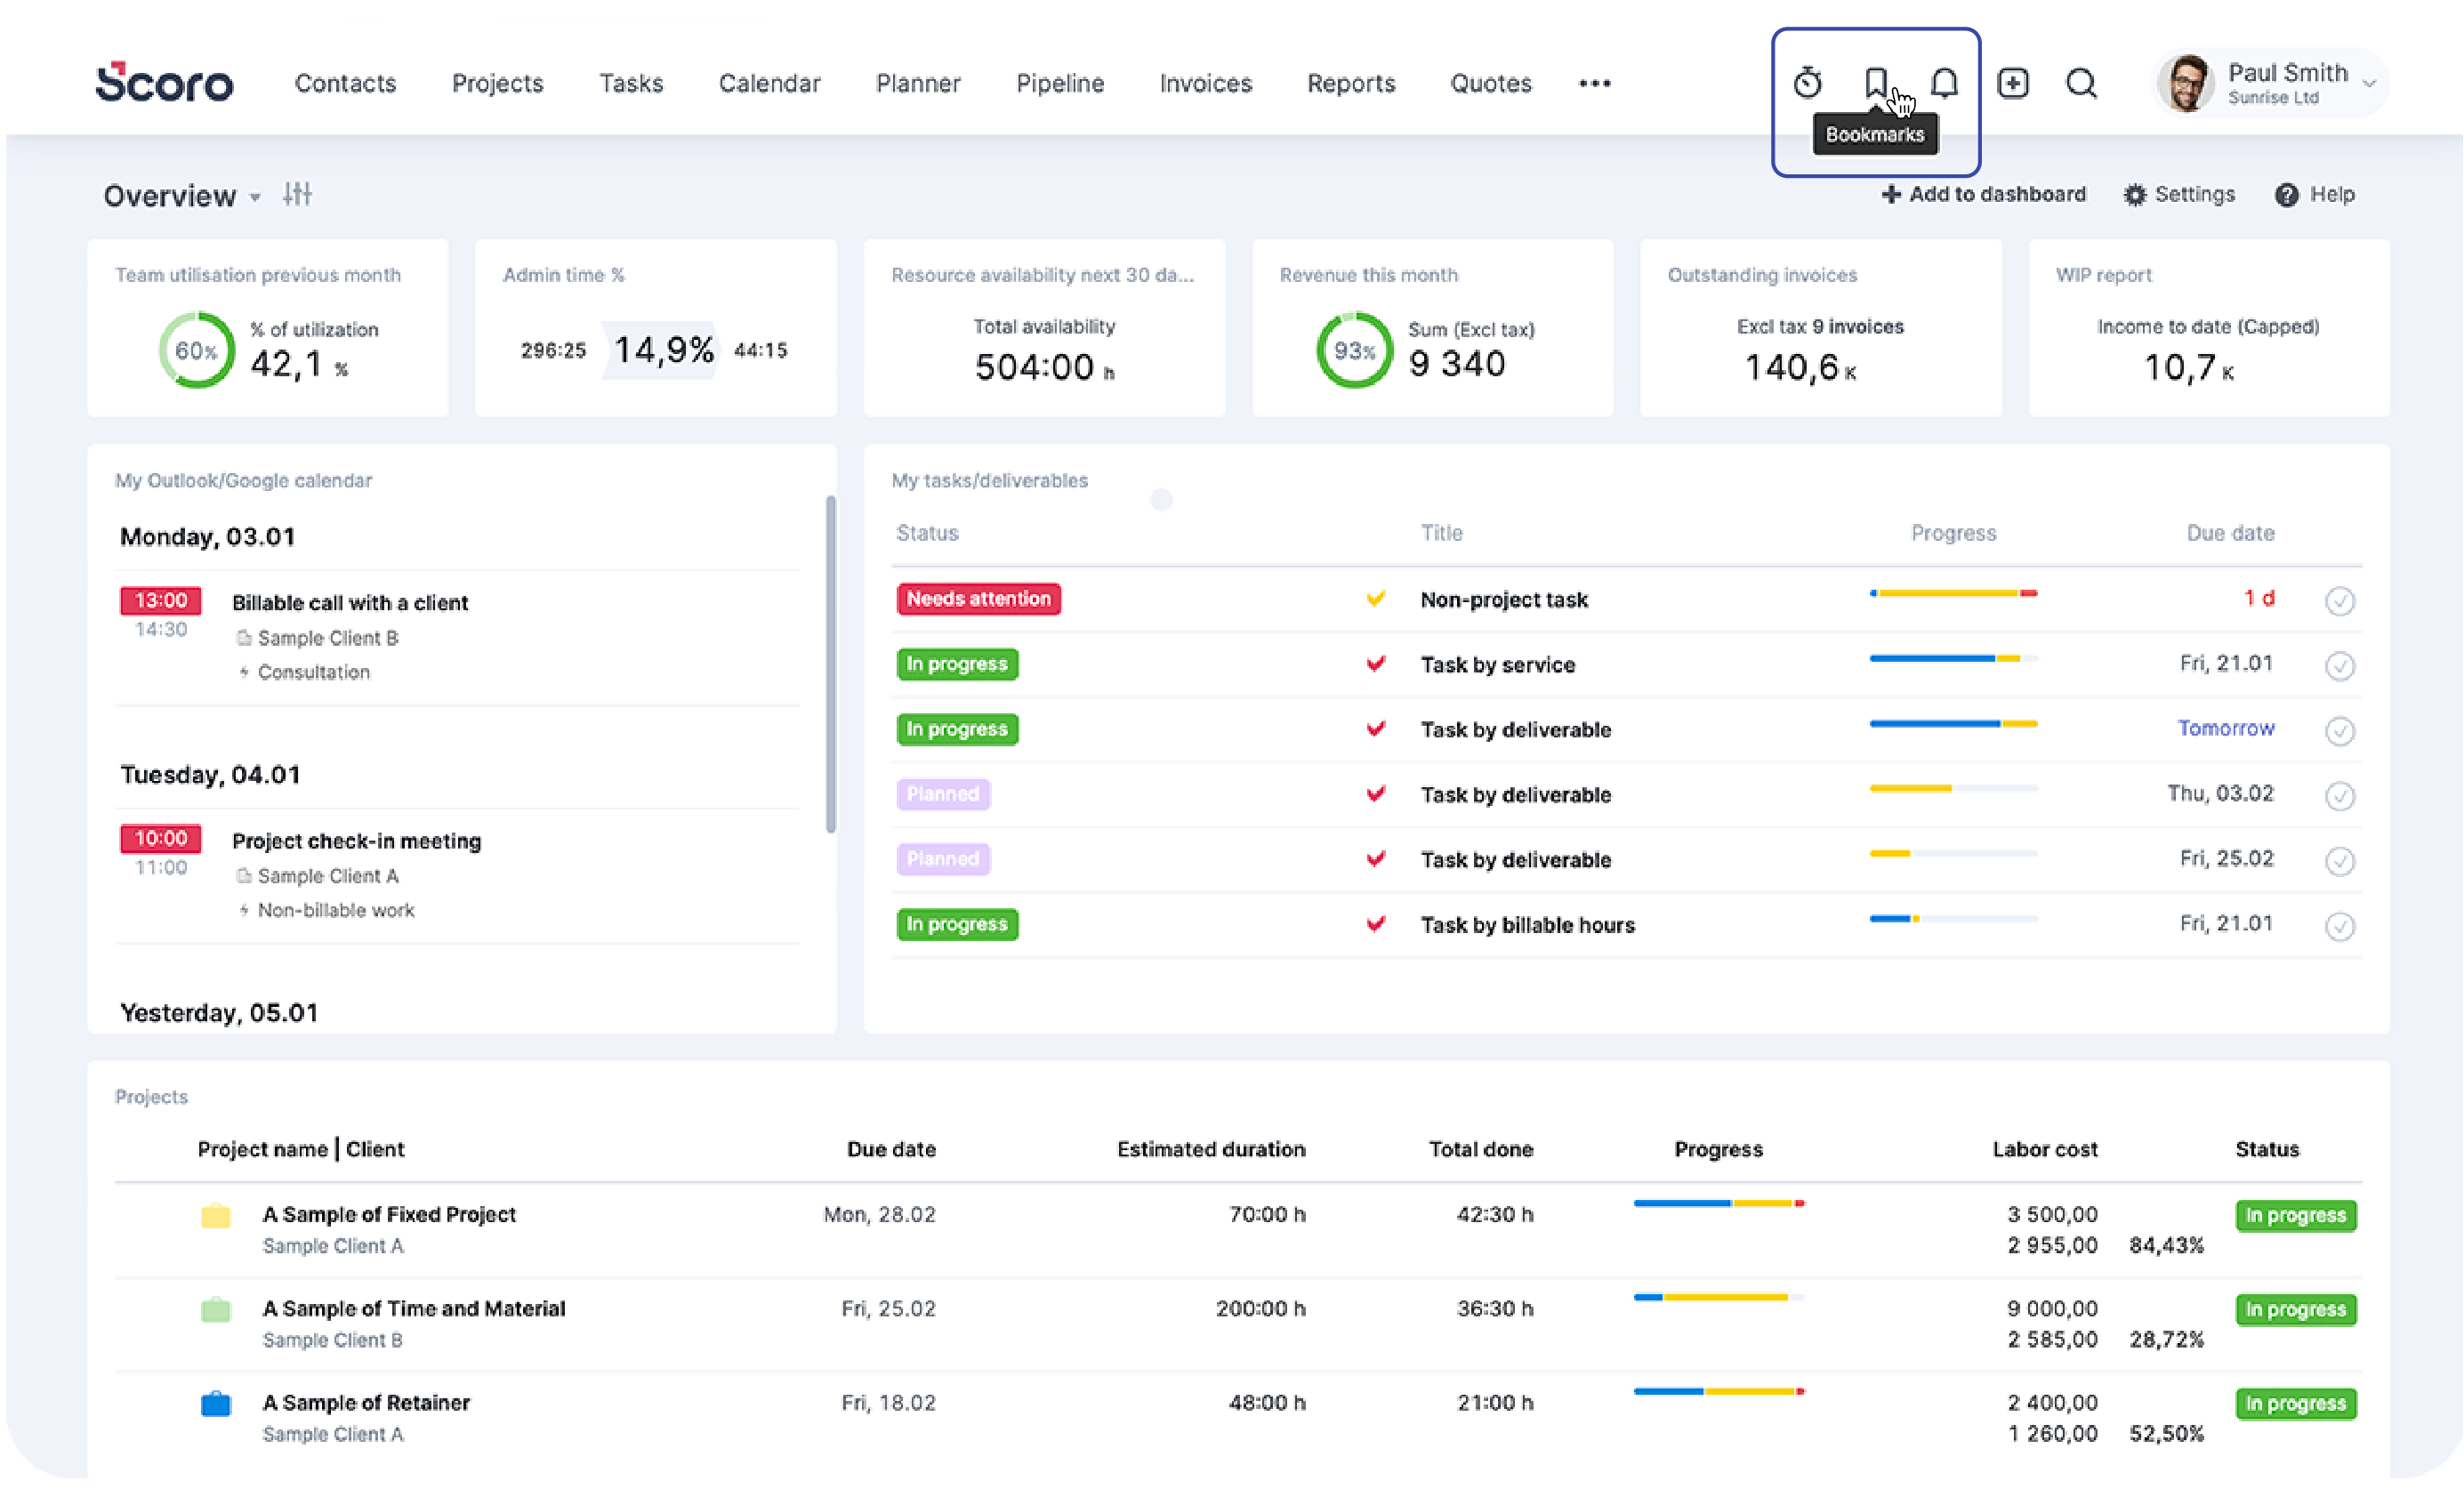
To save a filtered list as a bookmark, select the filters you’d like to apply. Next, click on the Bookmarks button and choose Save as bookmark.
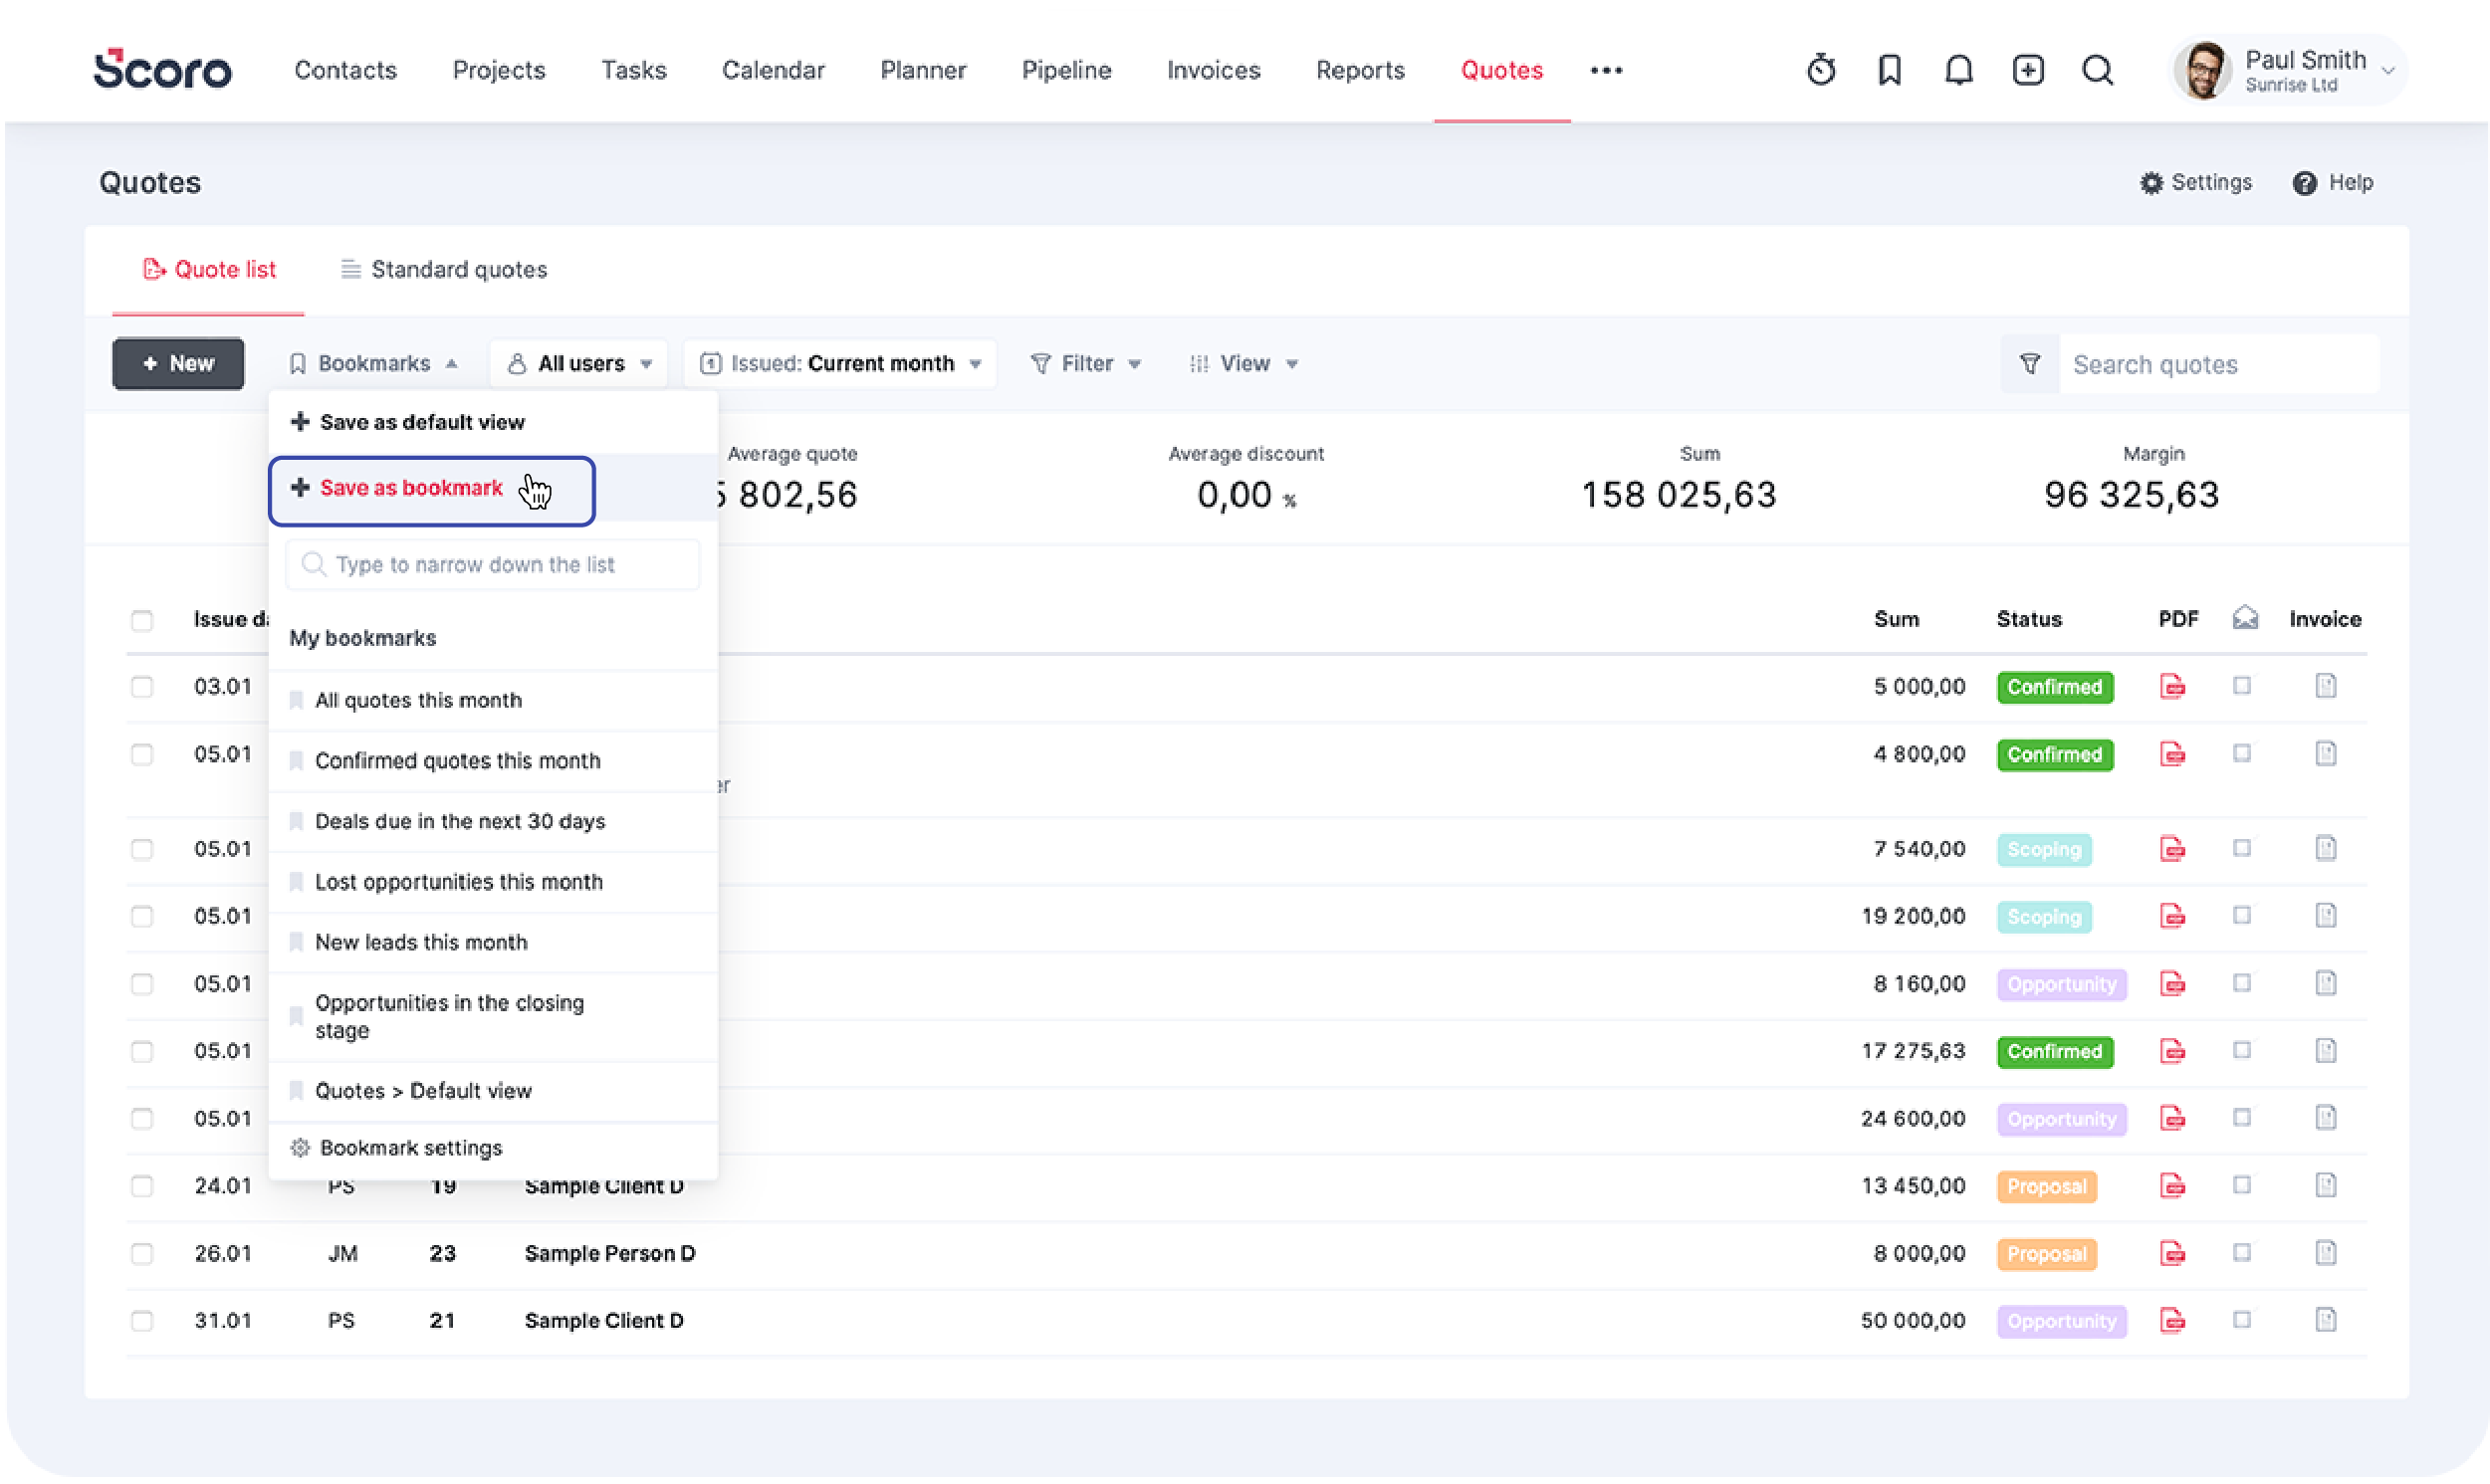
8. Default views
Is there a bookmark or specific filters that you often apply when working with a list? Maybe you’d like to see your clients filtered by their size or country? Or how about your task list filtered by projects instead of priorities?
To access your preferred view more quickly, set the filtered view as your Default view. This way, you’ll see a list filtered by preset parameters every time you open your lists.
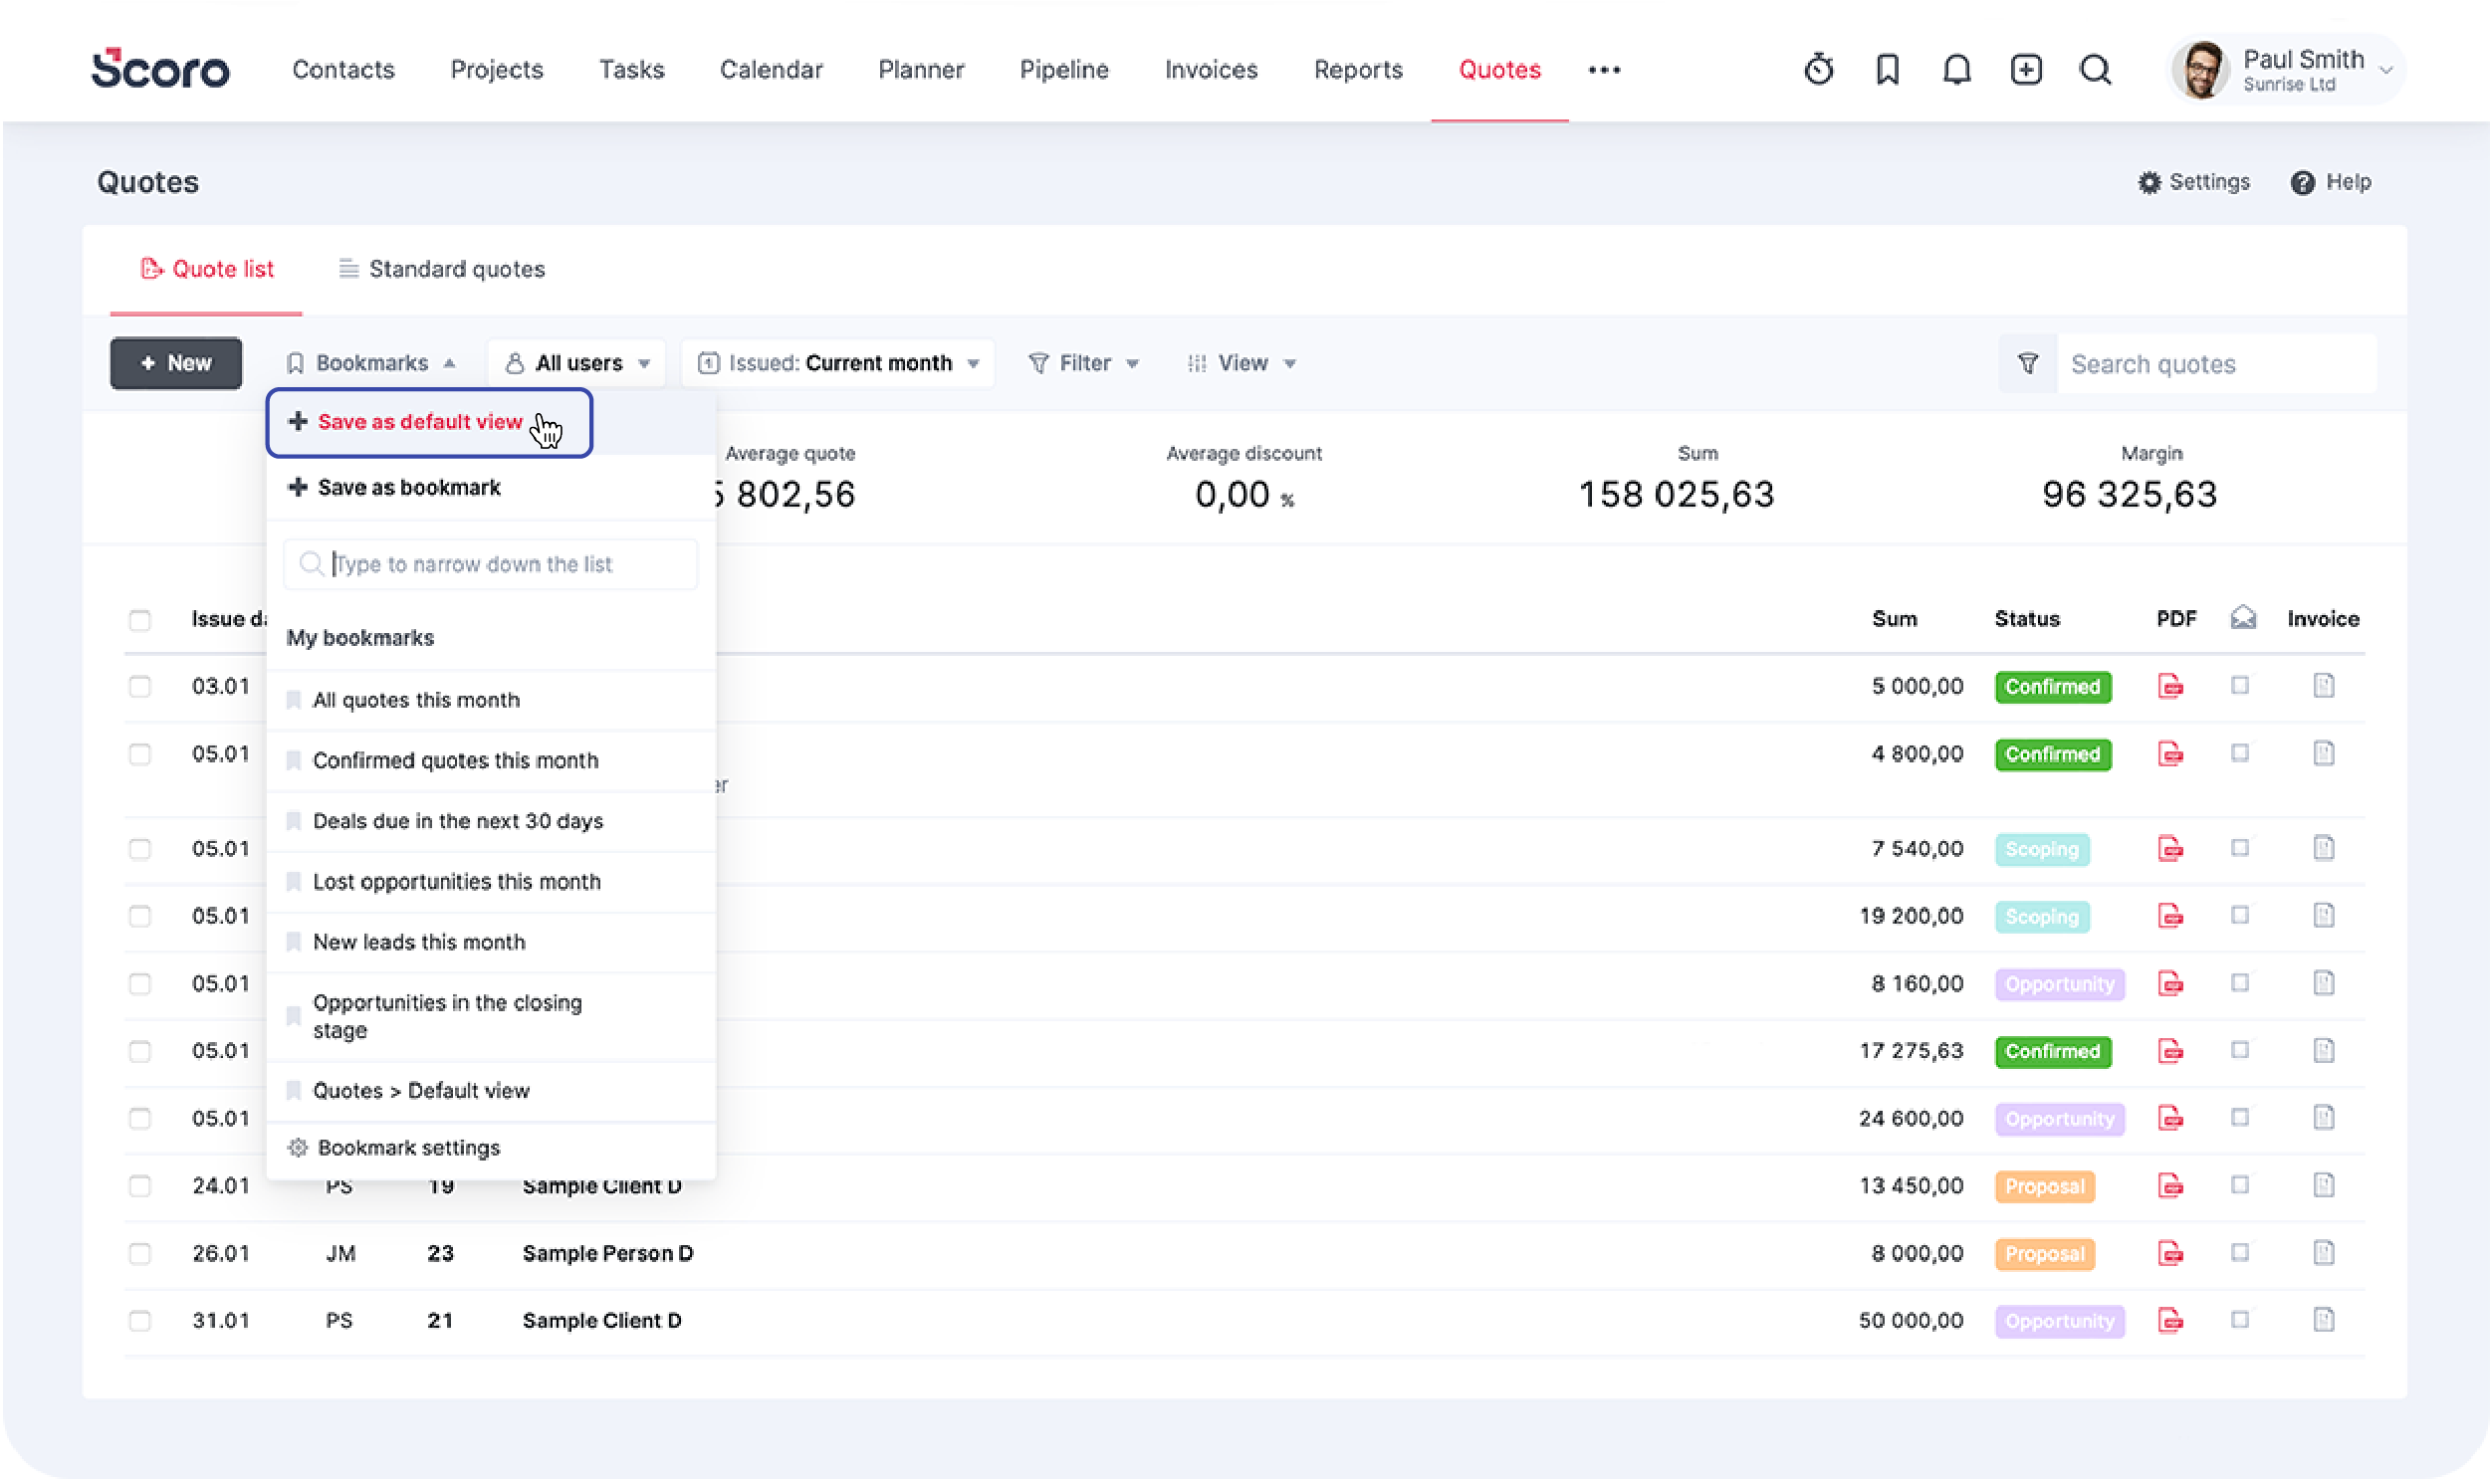
To set a filtered list as a Default view, filter your list, click on the Bookmarks button and select Save as default view.
9. Assign one task to multiple users
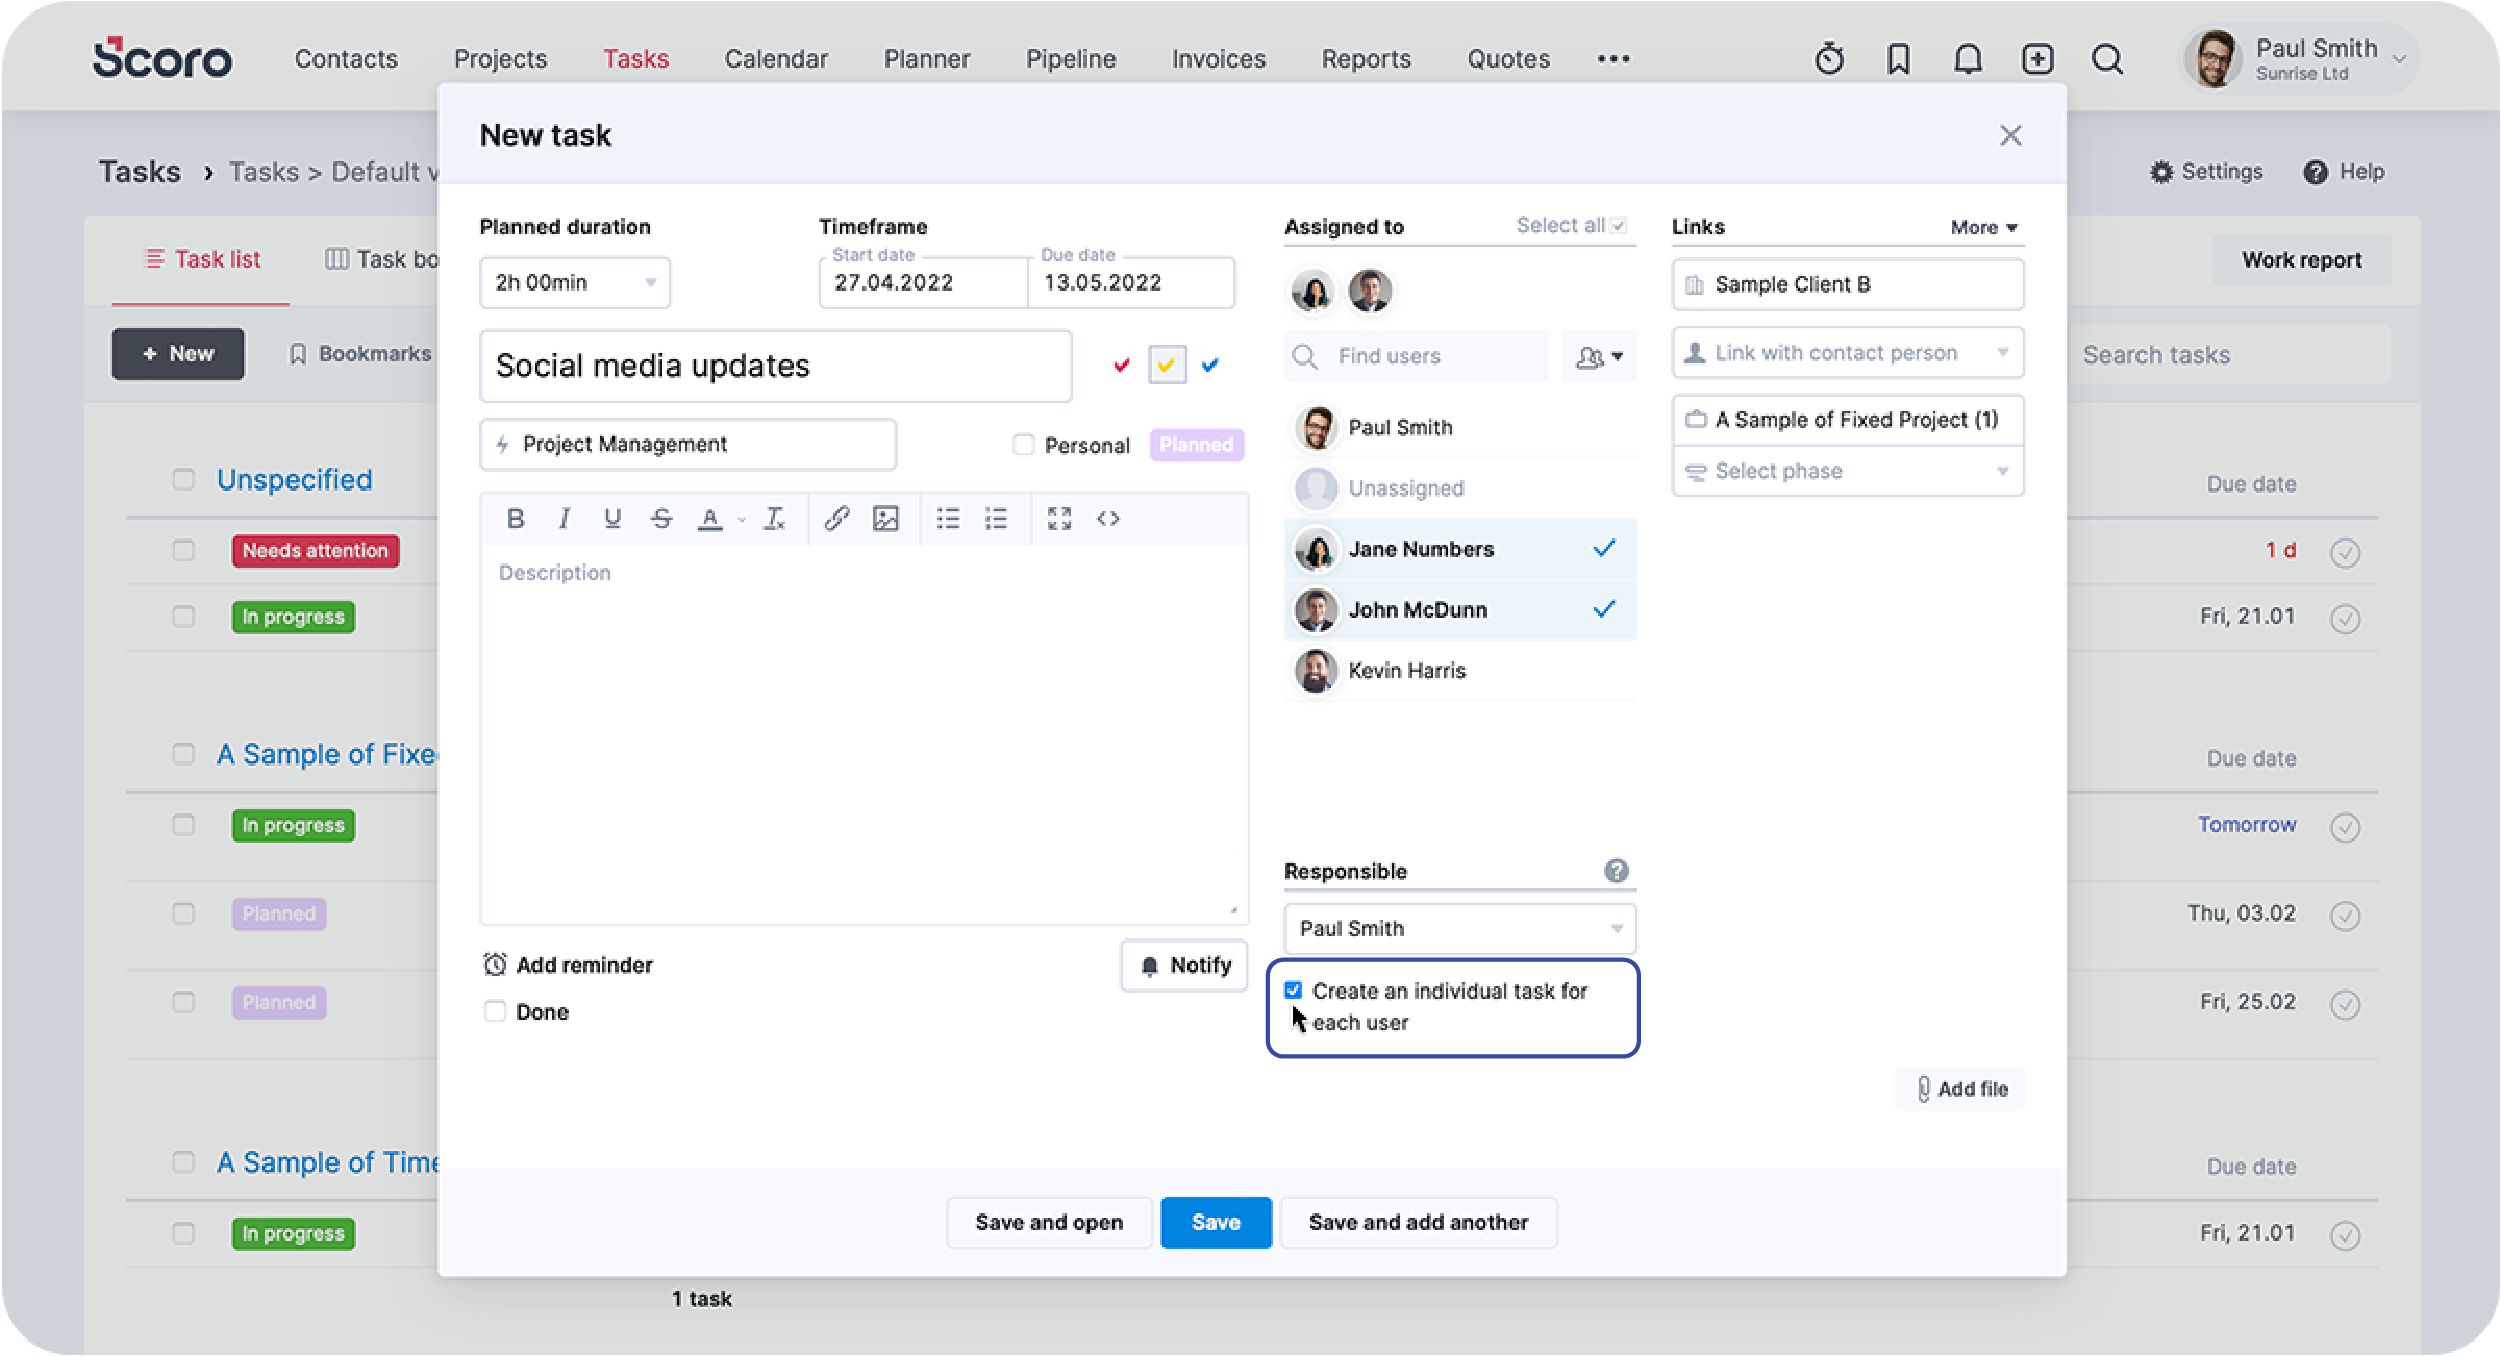
Sometimes, the task is too big for only one person. To assign a task to multiple users, select all the relevant users from the list. This way, a proportion of the task is added to each assignee’s task list. This makes it easy for each task assignee to
- log their work-time under the same task;
- get a quick overview of the task’s progress.
PS! Don’t forget to notify all involved users – just check the box Notify.
TIP4. You can also add an identical task to each user’s task list. Just tick the box Create an individual task for each user before saving the task.
10. Log your meetings under tasks
If one part of your task involves a meeting, you need to know about this hack.
It’s easy to log the time spent on the meeting under the task and quickly get an overview (and, if needed, charge the customer for) of all project-related activities.
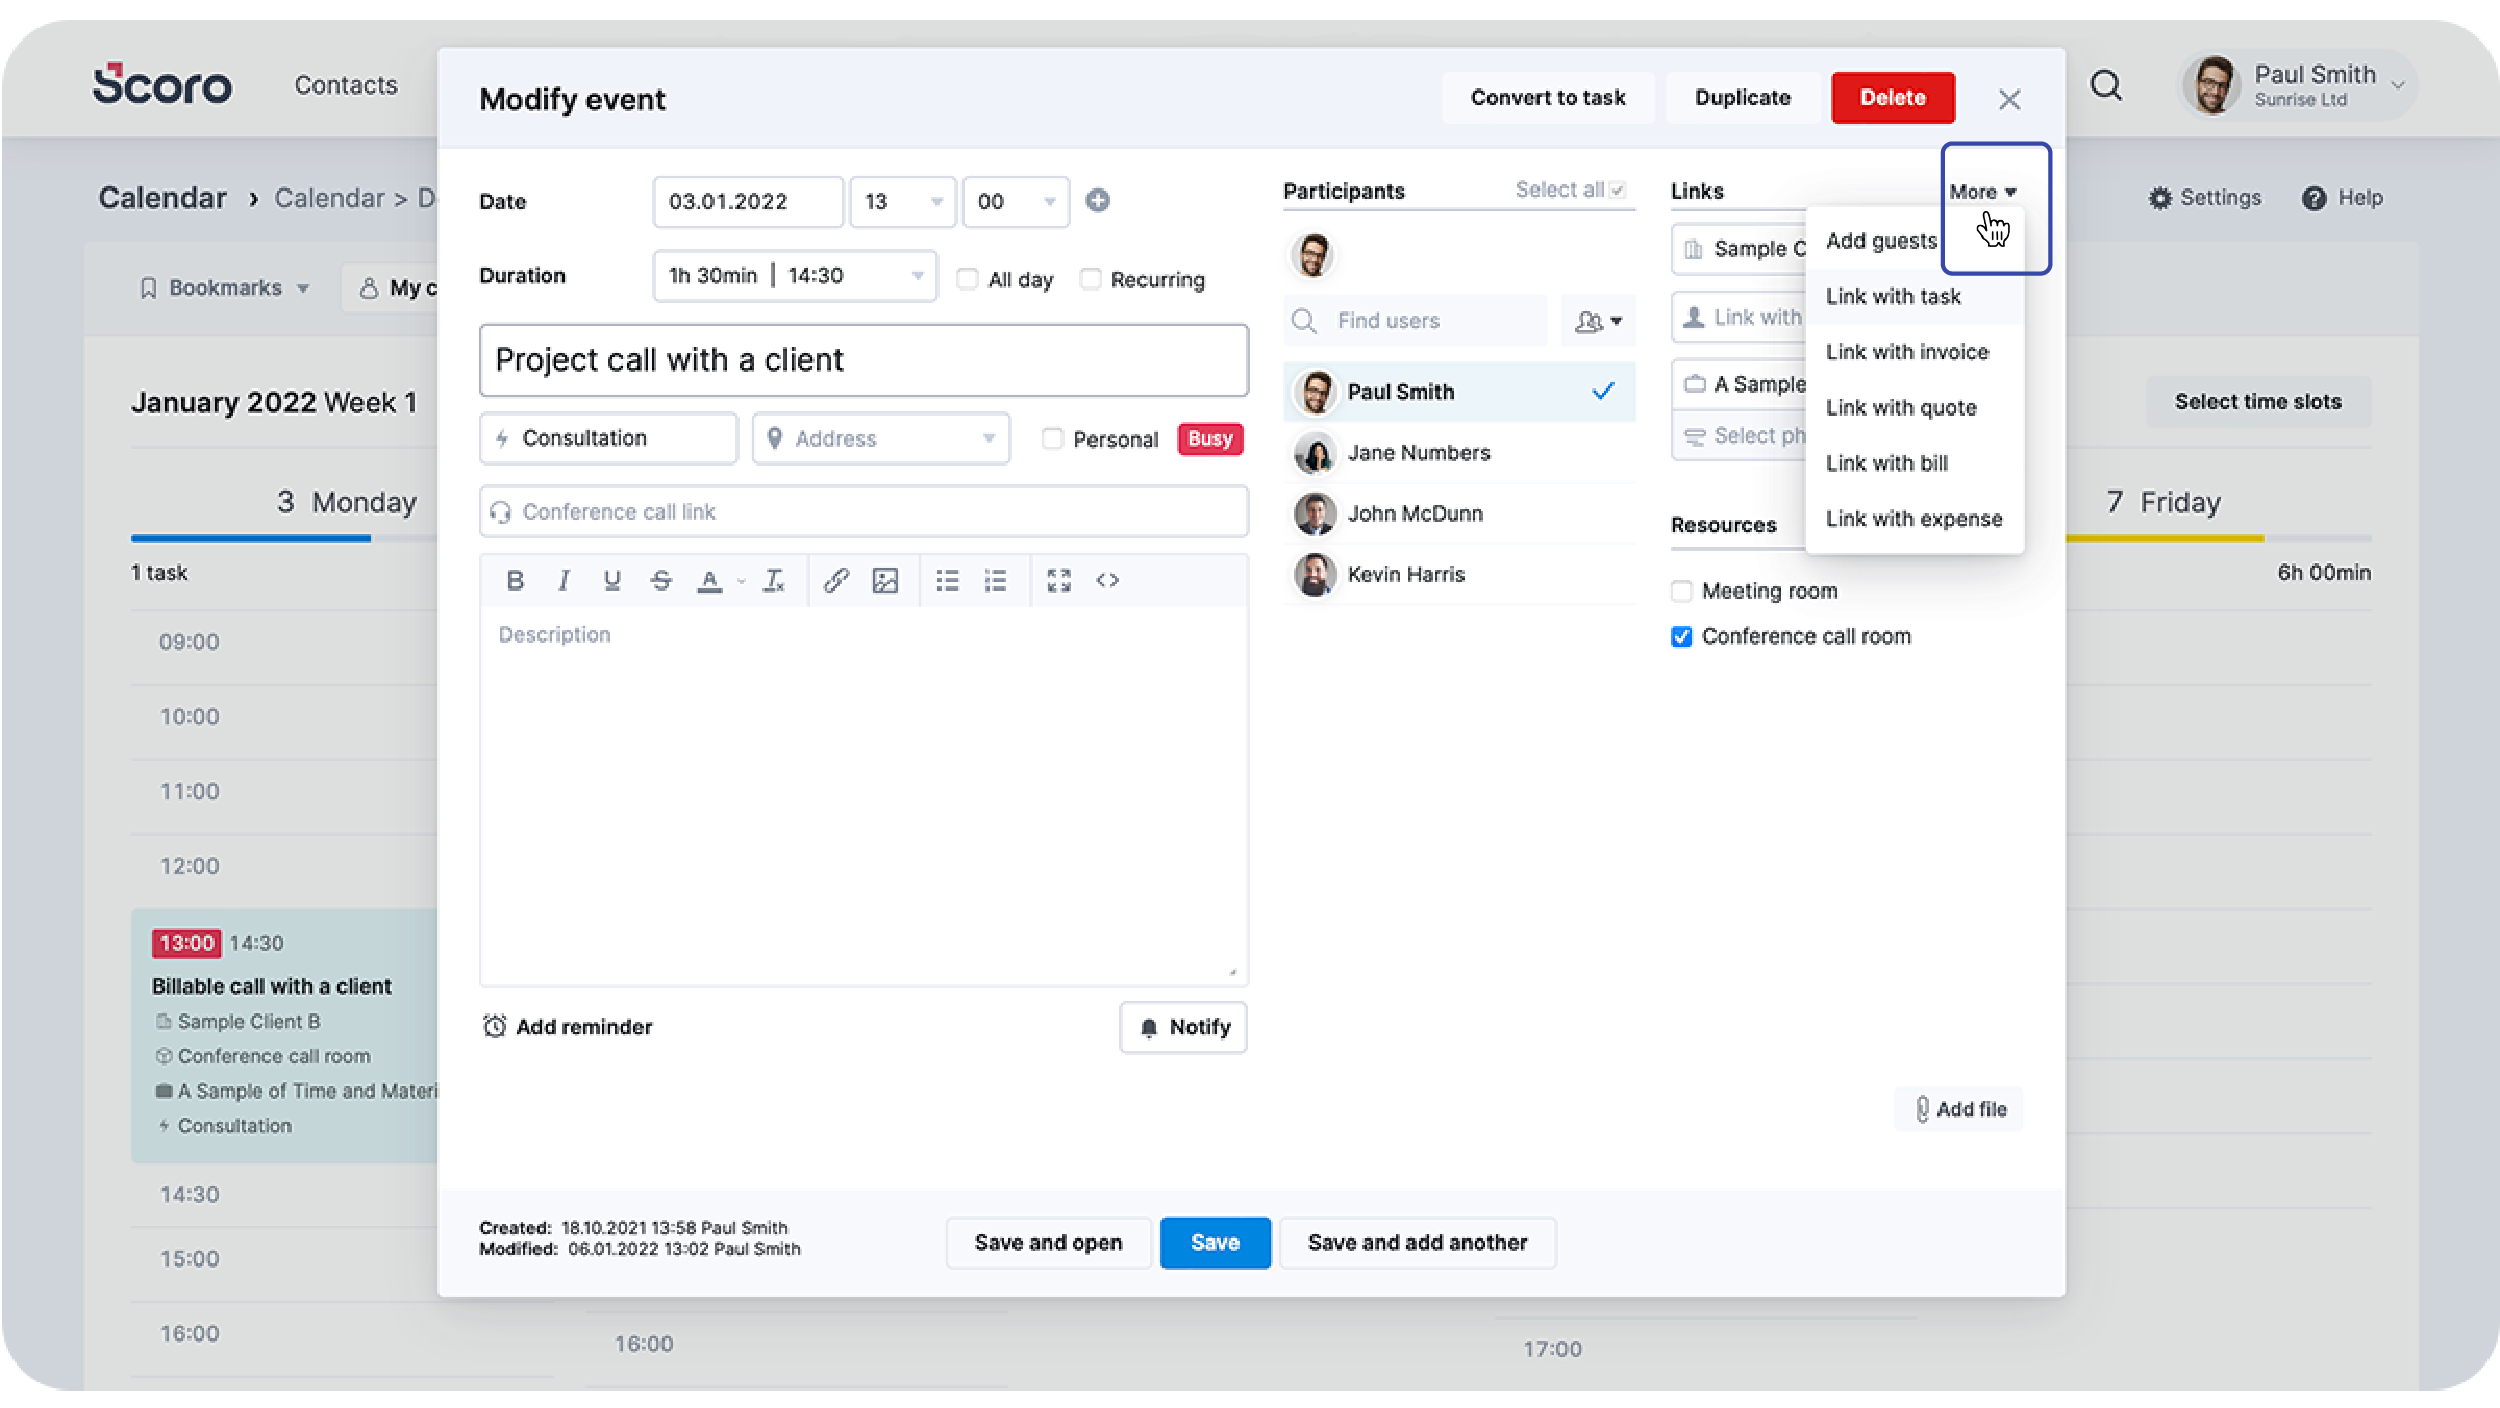
Read more on logging tasks under events.
11. Add default task settings
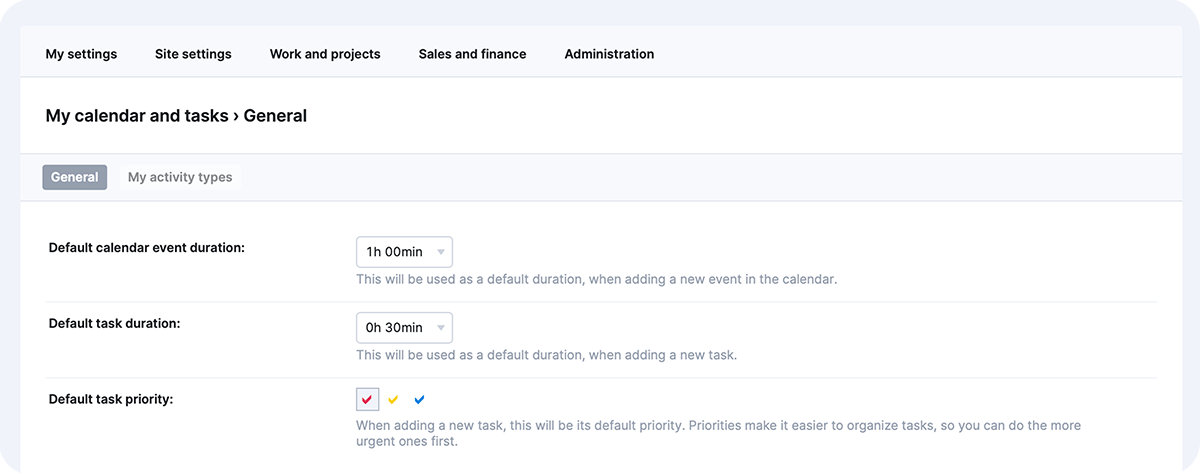
Working on different tasks can become tiresome if you have to constantly add information to the system. To make your life easier, there’s an option to set a default planned duration and priority for all tasks.
This means that whenever you open the task creation box, there are a preset duration and priority already in place. Many spared clicks equals a coffee break, right?
To set default values for your tasks, go to My settings > Calendar and tasks and select your preferred default priority and task duration. Don’t forget to hit Save!
Also, save even more time and, instead of adding tasks to Scoro manually, send an email as a task to your task list via Smart inbox.
12. Sort your lists
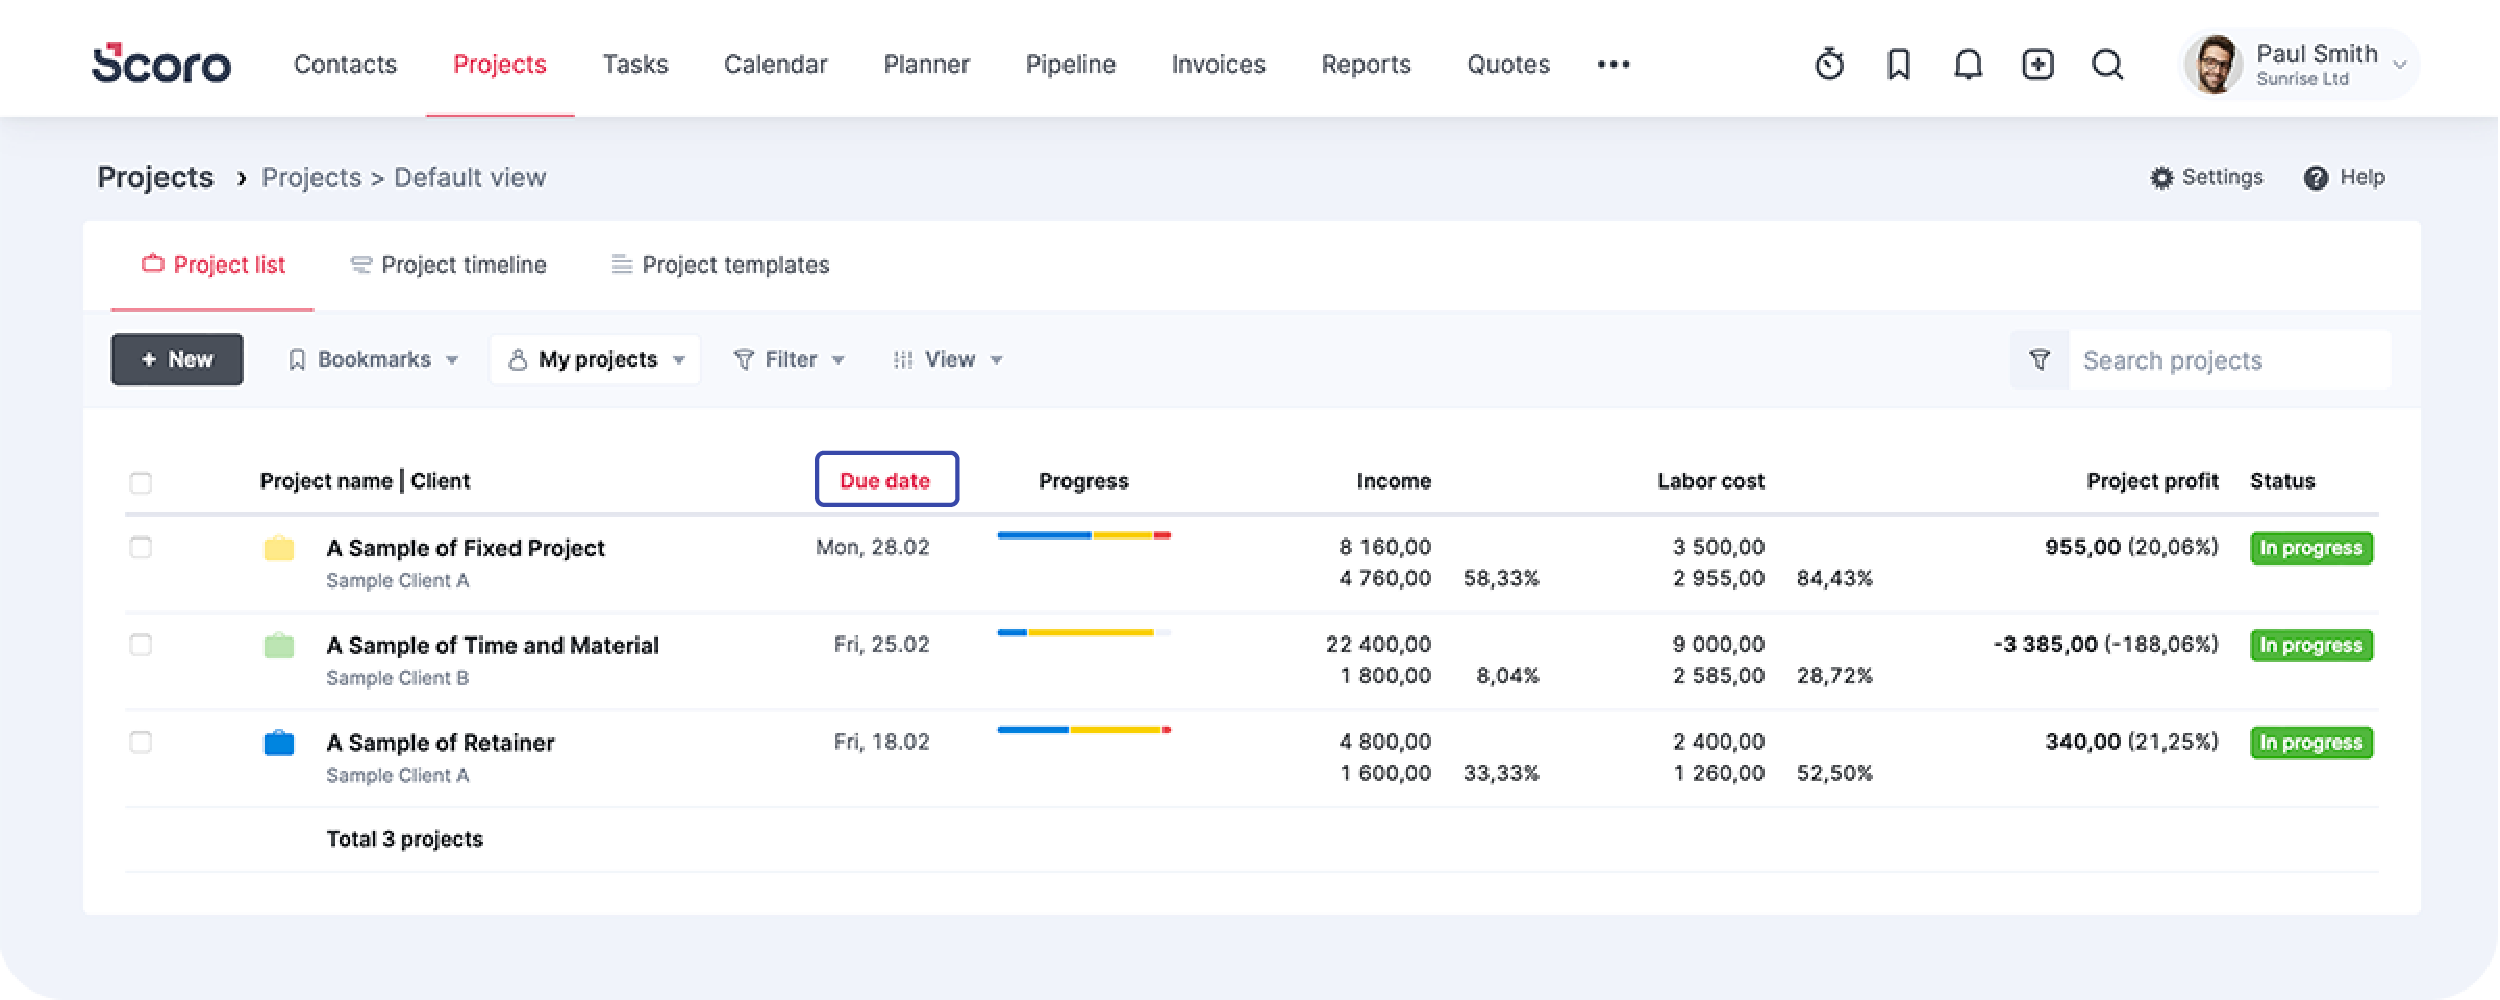
Have you ever wondered how to arrange your projects in the list view by their due date, or your client list by their account creation date?
Here’s the easiest way to do it. Simply click on the name of the column on top of the list. You can see which items are clickable by hovering your cursor over the column names.
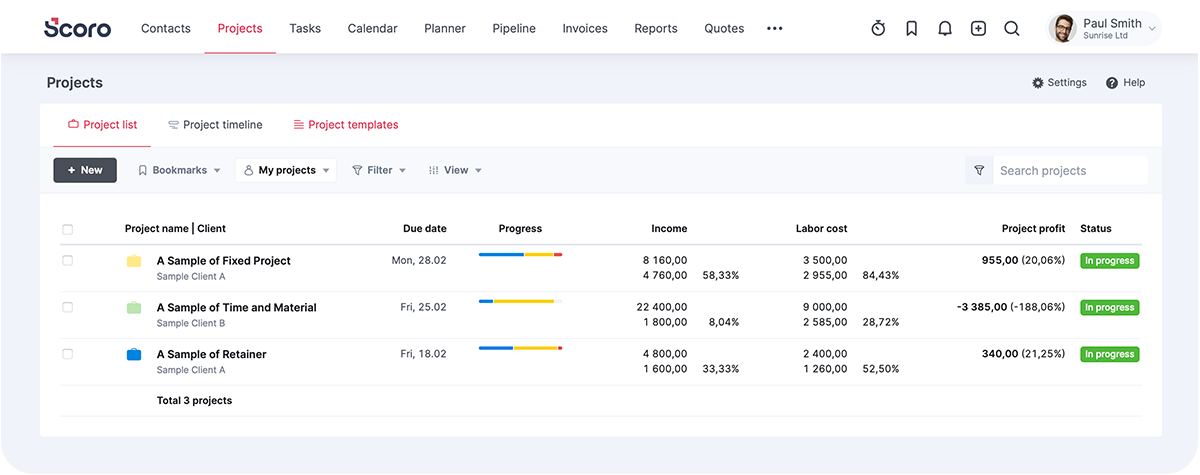
As you click on the column header Due date, all your projects are ordered according to their end date.
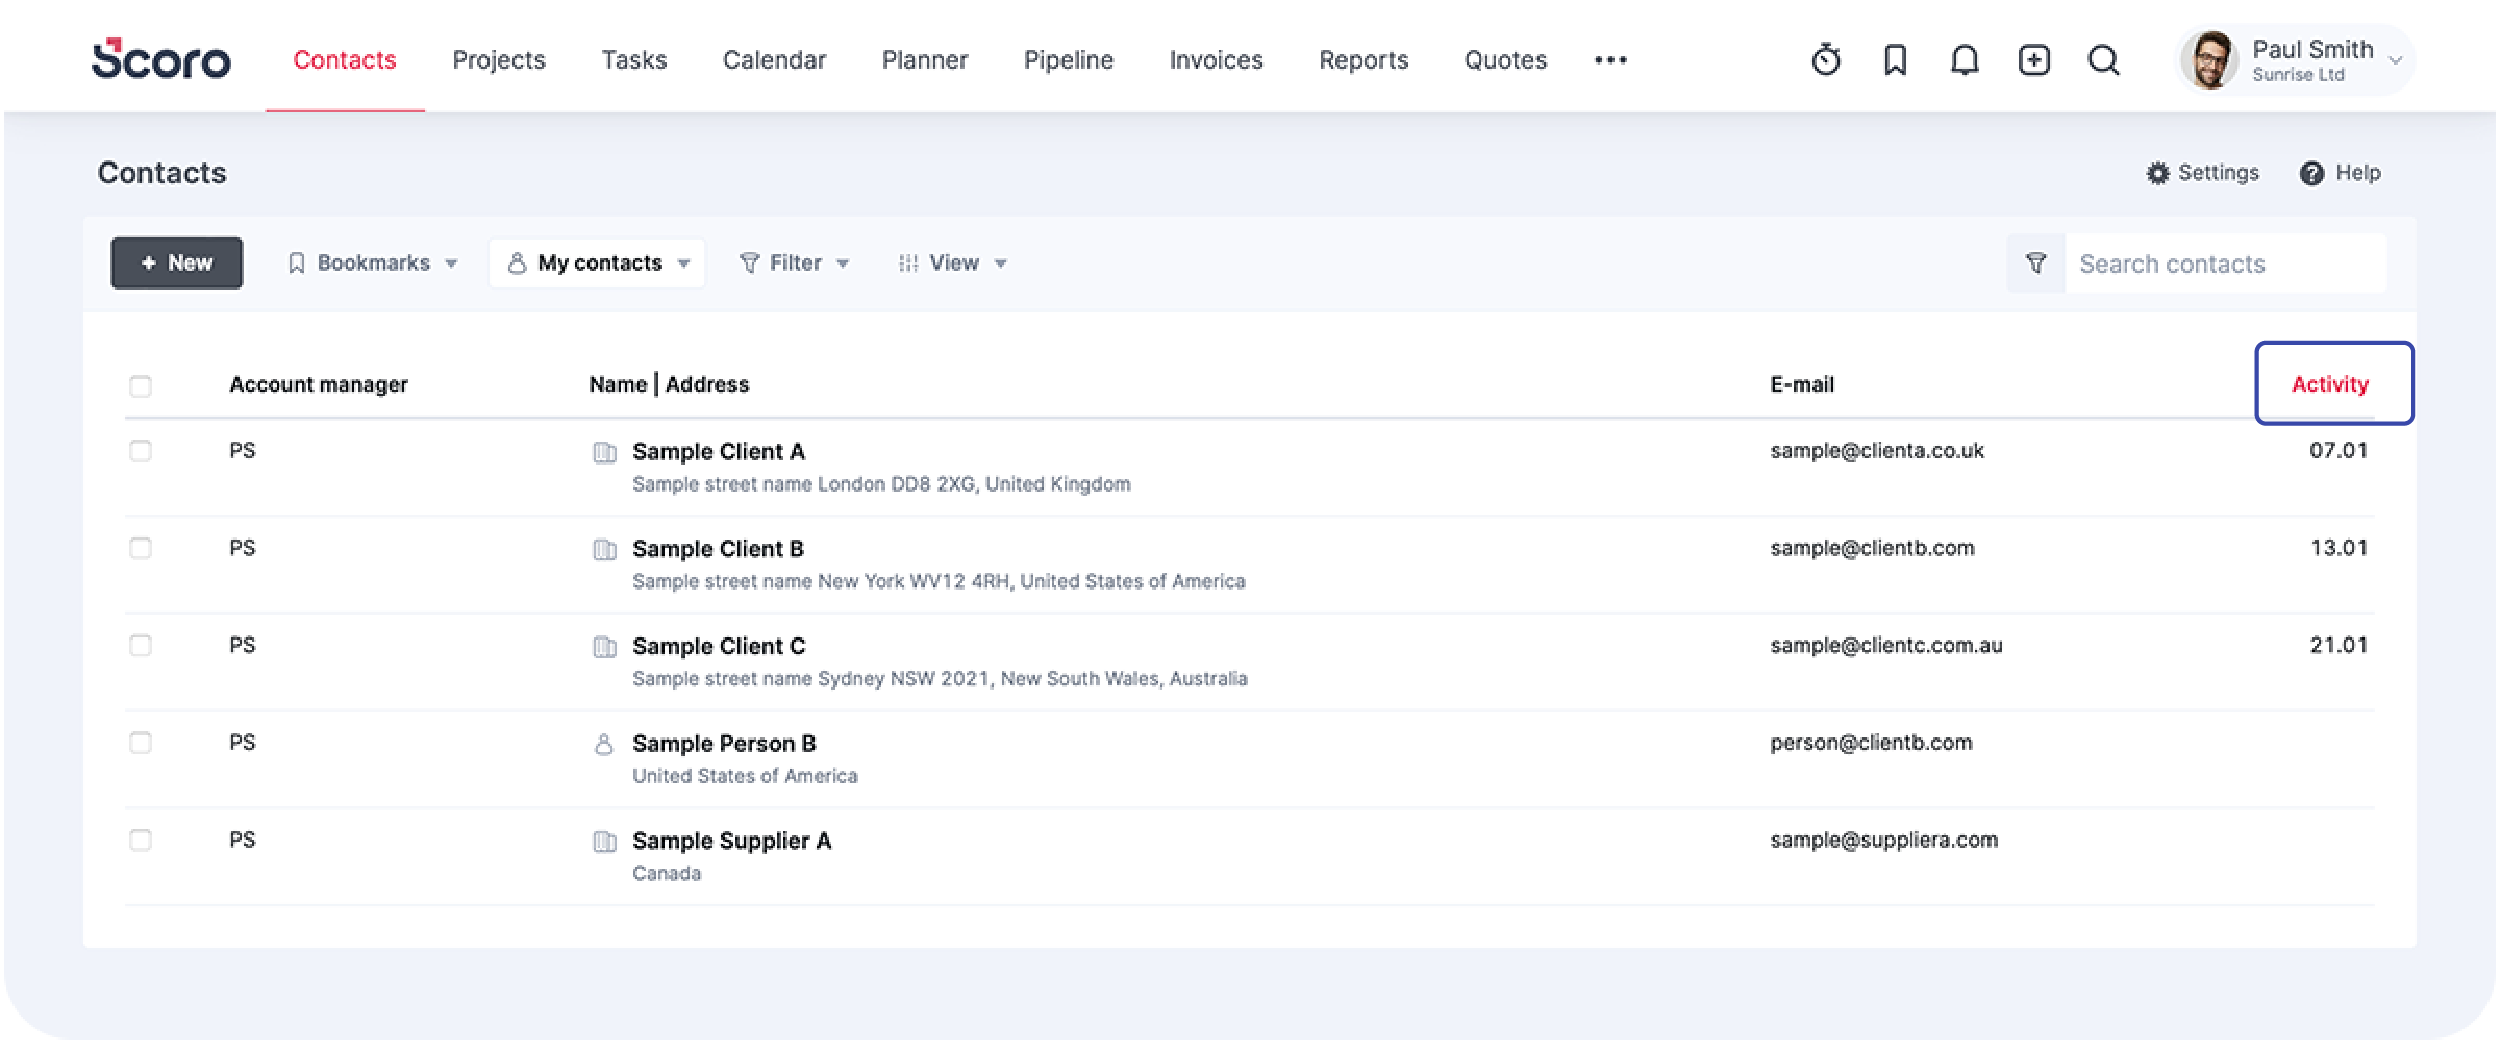
If you want to sort your client list by the most recent activity (let’s say), first click the View button and tick the Activity column to show up in the list view. You can drag and drop the order of the columns shown in the list.
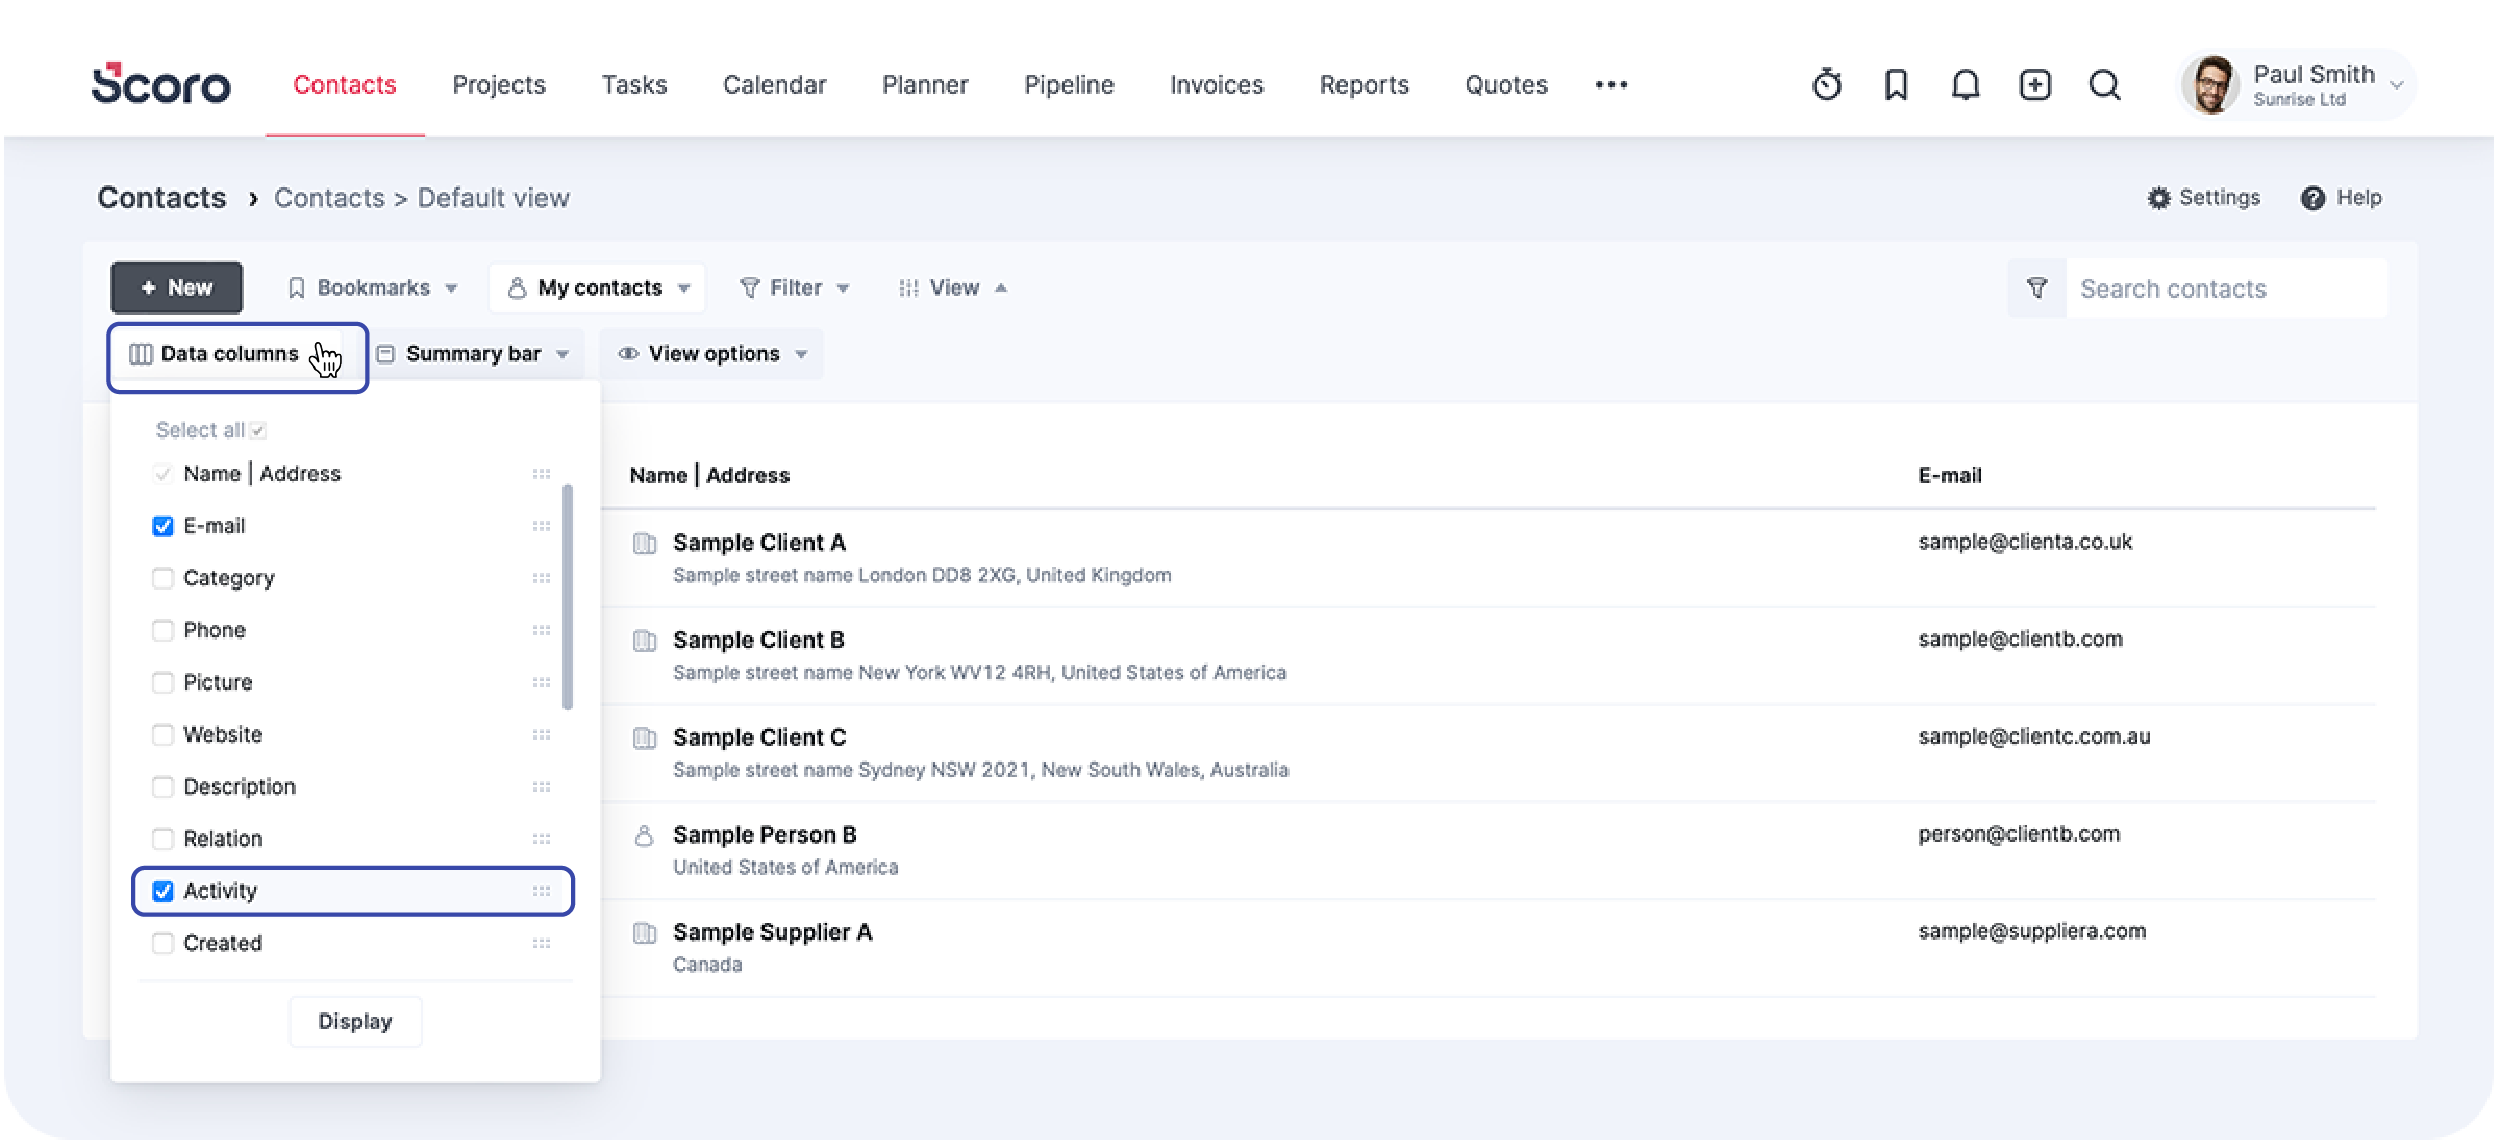
Now the column is added to the list view. Click on the name of the column to sort the list by activity.
Alright. There’s quite a lot of new information to process, so we’ll leave you to explore all the possibilities Scoro has to offer.
If you’re not yet a Scoro user, start your free 14-day trial today!


